Last Updated on
Wood rounding is a great way to finalize a project by adding that finishing touch. Some woodworkers don’t have access to fancy tools like a round-over bit for their router, but this doesn’t mean their projects have to be left unfinished. There are tons of other tools that can help them with rounding wood edges.
A router is a popular tool for this. However, not everyone can own one because of its considerable cost. But fret not because there are numerous devices out there that can be used to achieve the same result. Keep reading if you want to know how to round wood edges without a router.
Rounding With Sanding Block
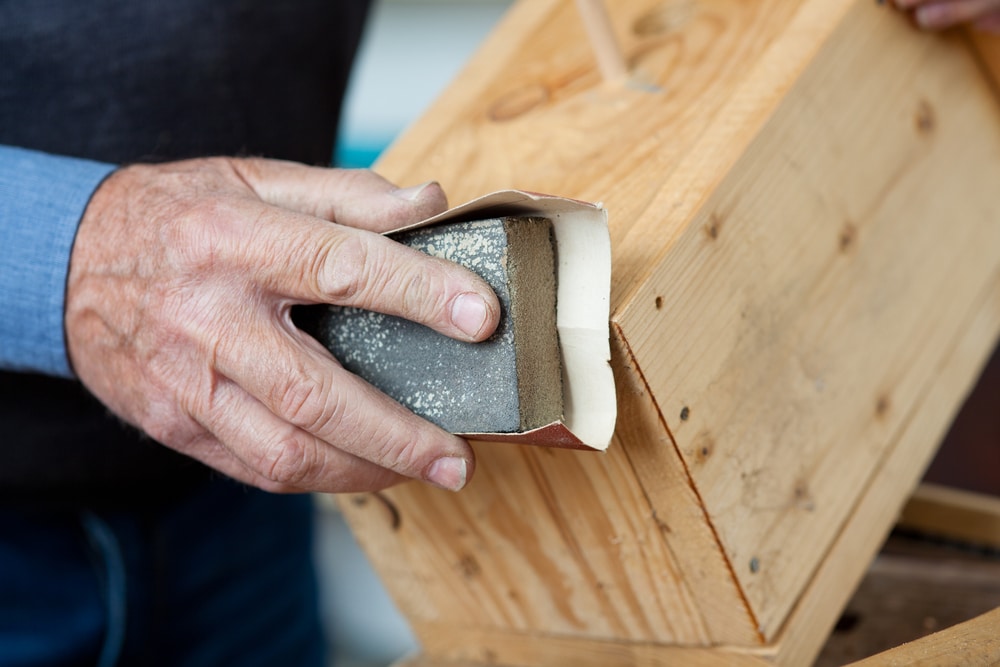
A coarse sanding block is a great way to quickly round wood edges. You can buy a sanding block at any hardware store, and they come in many different grits, so you can ensure you get the right one. You can also use a piece of sandpaper, but for greater results with a lot less work, go for a sanding block; it provides a flatter surface and more evenly distributes sanding pressure.
After rounding your board with coarse-grit sandpaper or block, you should move on to finer sands until the wood feels smooth enough for your liking. Then, finish off with an even finer grit if necessary—the goal here is to ensure that one side isn’t scratched up from too much pressure during this process. The surface should feel smooth and not like it has been worn down.
Rounding With Wood File
We know many people still don’t have access to routers or table saws and would instead use something they already own. So another method for rounding wood is to use a wood file. This tool is similar to a hand saw, but it shapes the wood instead of cutting into it. You can find curved files on one end, allowing you to make round wood edges.
Any flat-edged one will also work if you don’t have access to that particular file. Like with shaping tools, you want to start by roughing up the rounded wood edges with sandpaper and then move on to filing down the edge until it reaches its desired shape.
An important note when using this method: when making large cuts such as these, be sure not to push too hard to avoid splintering off pieces of wood onto yourself.
Rounding With Hand Plane
Photo: livingwoodcraft: Rounding over edges with a hand plane is much more enjoyable for me than using a… http://t.co/0ZbI4JzSXr
— Woodworking TAO (@WoodworkingTAO) May 18, 2014
Hand planes are the best tools for removing wood from flat surfaces and rounding wood edges. These devices have been around for centuries and are still an invaluable part of any woodworker’s arsenal today. They can be used to clean up rough cuts made with other tools or to make your work more precise by removing small amounts of material at a time.
You must constantly adjust the angle of the hand plane if you want to create round wood edges as you work your way around the piece. The advantage of this approach is that it keeps things nice and tidy; there isn’t any extra material you need to remove alongside what you’re working on with this method.
However, this means that your hands will take some abuse as they keep adjusting their grip on the plane while working on each edge segment—and sharpening those planes will become increasingly difficult.
Depending on the type of wood, you can choose from various hand planes. Thin pieces of wood work well with the block plane. A jack plane is the best tool for both small and long workpieces. For larger boards, a jointer plane works well. Almost any size and type of surface can be smoothed using a smoothing plane.
Rounding With Power Sander
A power sander is similar to how you would use a router. It is an electric instrument used to polish and sand surfaces. You’ll need an abrasive, like sandpaper, which you attach to the power sander’s pad. The pad should be the same size as the wood you are rounding.
The power sander rapidly pushes a piece of sandpaper or another abrasive, frequently in a circular motion, to remove material from the surface being worked on.
Rounding With Chisel
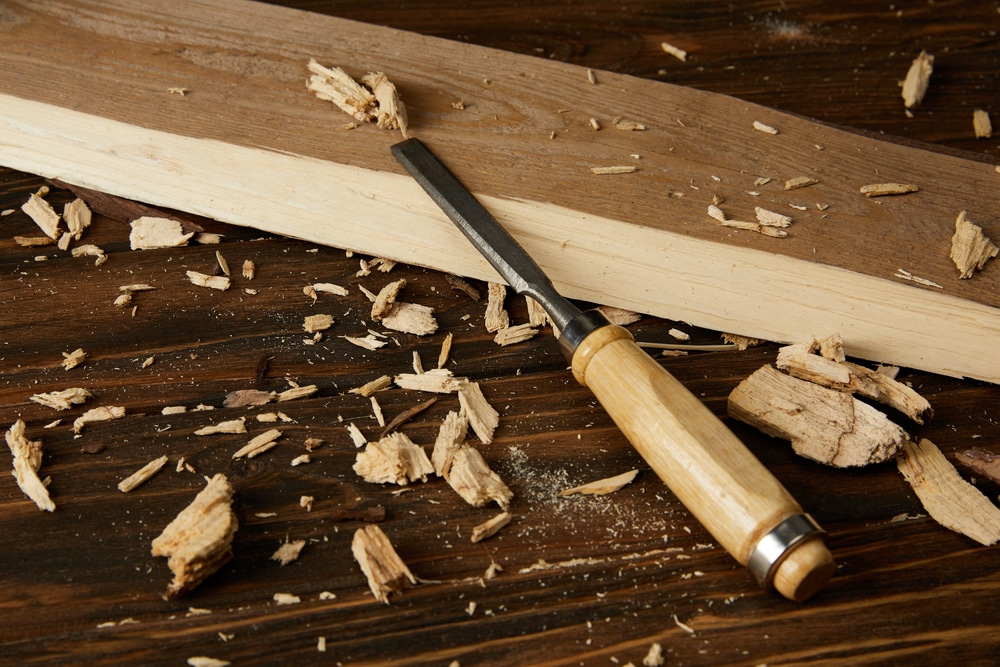
A chisel is a hand tool to create grooves, depressions, and round wood edges. They are made of high-quality steel and come in various shapes depending on your need. If you don’t want to remove a lot of wood at once, using a chisel requires a lot of expertise and skill.
The main thing to remember when operating one is not to use too much force when striking the chisel to avoid cracking the wood or taking out too much at once. You’ll also need to use the sandpaper after cutting through your project so as not only to smooth out any rough and rounded edges but also to polish off any jagged wooden edges.
Rounding With Rasps
Rasping is another excellent way to round wood edges. This method can be used on many types of wood and materials, including plywood, hardwoods, and softwoods. Rasping is especially useful for rounding sharp edges and corners that would otherwise be difficult or impossible to shape with other tools.
Rasps are shaped like small saw blades with coarse teeth that work efficiently at removing large amounts of material quickly. They come in many shapes and sizes for various purposes, ranging from rough shaping to fine finishing applications.
The shape of your rasp depends on the type of work you intend for and how much control over your edge profile you desire. A straight-sided file offers more direct control than one with rounded ends since its narrow width allows closer access when working around obstacles such as knots or grain patterns within a piece of wood.
Rounding With Spokeshave
A spokeshave is a woodworking tool with a blade fixed into the body and one handle for each hand. In woodworking tasks, it is used to shape and smooth wood. A spokeshave works with a bench plane to create concave surfaces and rounded edges on wood.
To round the edges of your wood, place the blade of your spokeshave at 90 degrees to your workpiece and push it forward while pulling back slightly so that only one edge of the blade touches the wood. You can maintain this angle while creating curves along an object’s edge or surface with practice.
Rounding With Dremel
A Dremel is perfect for routing, inlaying, and mortising in wood and other soft materials. It is also used for edging and grooving wood. It’s a practical choice for those who don’t have access to a router or if you’re working with smaller pieces of wood that would be difficult to handle.
With a Dremel, round wooden edges may be produced quickly and easily. However, it might be challenging to maintain control. Another thing to remember is that applying too much pressure to one area risks destroying the finish’s flatness.
To round edges with a Dremel, trace a template curve onto the wood with a pencil. The curve of the wood should be gradually arranged by following the lines and using sweeping motions to get rid of the pointed corners. Use sandpaper to smooth off any sharp edges to achieve a better shape.
Rounding With Jigsaw
A jigsaw can be a good tool when you need to round off sharp edges and corners of the wood. Although it’s not as precise as using a router, it’s also a lot quicker and is often more flexible. A jigsaw cut in both directions, so you can adjust the cut as needed to get the radius right.
Be prepared for some cleanup work, however: jigsaws leave rough wooden edges that require sanding or chiselling down before they’re ready for finishing. To help avoid this problem, ensure all your curves are consistent in size and shape. This will give you accurate results every time—and make life easier when it comes time to finish your project.
No Router? No Problem
Most woodworkers are familiar with using routers to round wood edges. It’s easy to forget that other ways exist to accomplish this task. We hope you found the article above helpful and informative on how to round wood edges without a router. The tools discussed here should be a welcome addition to any woodworker’s tool arsenal, and hopefully, they will help you do more with your woodworking abilities.
As always, we recommend using proper safety gear when working with power tools, but even then, it’s essential to know what you’re doing before attempting any of these methods. It’s also good practice to test your techniques on scrap pieces —especially if this is your first time using some power tools mentioned in this blog. Happy rounding.
Paul is the type of person who never met a problem he couldn’t fix. He can always be found tinkering with something in his house, even if it isn’t broken! His tips and tricks are often shared on our site. He’s the one you call when something breaks because he has been known to improvise fixes for everything from leaky faucets to malfunctioning dryers.