Last Updated on
Ice makers are a valuable addition to any home kitchen—until yours stops working and you don’t know how to fix it.
Many people simply hold on to their ice maker unit until they get around to replacing it. Others make expensive service calls. If you know how to solve common ice maker problems, you won’t have to deal with additional stress and expenses.
If your ice maker stops working, the following repairs could help you troubleshoot the problem. Use this guide to learn how to repair an ice maker and get your ice back without incurring astronomical costs.
Method 1: Ensure Your Ice Maker Is On
It isn’t uncommon for people to accidentally switch their ice makers off. If you have a portable or countertop ice maker, ensure that you have plugged it in correctly and connected all power lines. If your ice maker is in your fridge, check the control panel to ensure it is on.
Lastly, remember to check the fill bar. This is the small metal bar that sits above your ice bin. It can flip up when the bin is full, preventing the ice maker from producing more ice. Ensure the fill bar is in the appropriate position.
Method 2: Check Your Freezer Temperature
If your ice maker connects to your freezer, make sure that your freezer is at the appropriate temperature. If it is too warm, the ice will melt, or your machine will stop producing ice. If it is too cold, you risk having a frozen water line or clogging your bin with ice chunks.
Check your ice cubes for frost or melting ice. Find the temperature dial and adjust it accordingly.
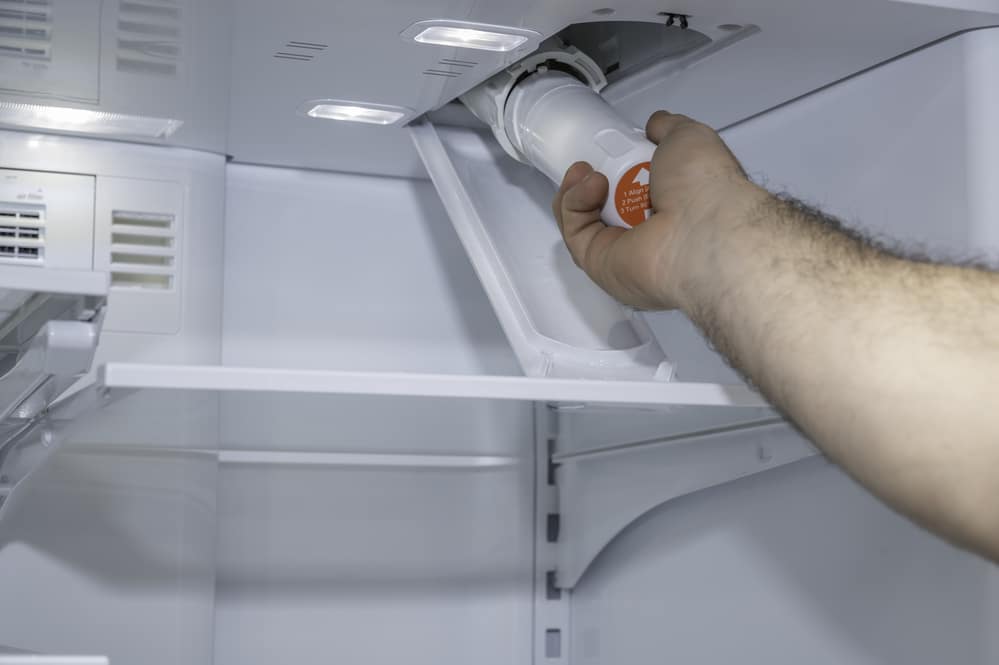
Method 3: Check Your Water Filter
Many people need to change the water filters inside their ice makers. Ensure you check yours frequently. If it appears dirty, clogged, or damaged, replace the old filter with a new one.
Method 4: Check Your Water Line
If your ice maker has stopped making ice, you may have a disruption in your water line. Follow these steps to ensure that the water is running.
- First, check the water pipe inside your ice maker. Ensure that there isn’t damage or blockage.
- Check your water pressure. If it is insufficient, water will not be able to flow into your inlet valve.
- Check the water supply line that leads to your ice machine. If something is clogging the water line, the ice will fail to appear or smell poorly. A cracked or broken pipe will require more extensive repair.
- Check the water inlet valve, which delivers water to your ice maker. If there is no continuity, your valve has no electrical connection.
- If you suspect your valve has failed mechanically, you can remove the valve, hold the line over a bucket, and check the water flow. If it is weak, something is also affecting the water supply. If the flow is strong, your valve is likely the problem, and you should replace it.
Note: If something has disrupted the water inlet, do not attempt to fix the valve yourself.
Method 5: Check the Solenoids
Your ice maker connects to the water line via a solenoid on the back or bottom of your fridge. If something has disrupted the electrical connection, the solenoid cannot receive power and won’t allow ice to form. Thankfully, you can fix this issue yourself.
To check your solenoids, follow these steps:
- First, unplug the refrigerator.
- Remove the small screen on the inside of the solenoid.
- Clean the solenoid and inspect it for any damages. If the solenoid has suffered damage, buy a spare part online and replace it yourself.
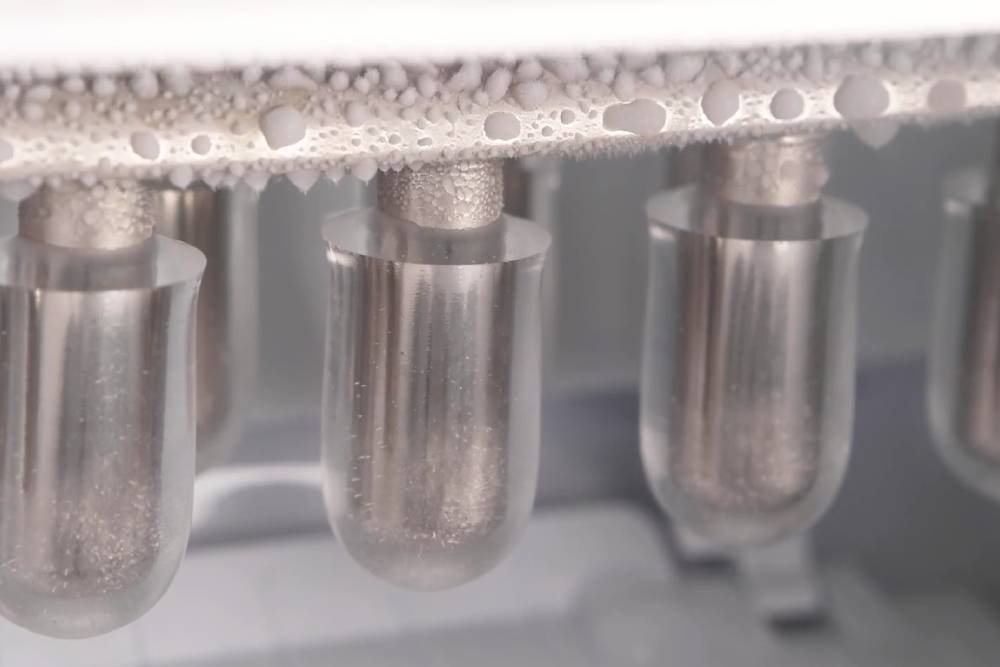
Method 6: Check for a Frozen Line
If your ice maker suddenly stops working, you may have a frozen line. Check if frozen water is inside your appliance and follow these steps.
- Cut the Power: Unplug the refrigerator or cut your breaker.
- Locate the Fill Tube: Your fill tube is a long white hose that brings water to your ice machine.
- Warm the Hose: Use a hair dryer to warm the fill tube. Remember to exercise caution and wipe up any dripping water, as using a hair dryer may present a risk of electric shock. You can also use a warm rag or turkey baster to soak the hose in warm water.
Method 7: Check Your Ice Maker Assembly
Your ice maker ejector assembly is the part of your appliance that allows the ice to travel from the ice bin to the ice tray. Check to ensure that there is no ice trapped in the chute or blocking the ice from flowing. Check your ejector assembly’s gear, motor, and flap to ensure that each piece works appropriately.
If You Can’t Fix It
If you’ve tried every method and your appliance still isn’t producing ice, it may be time to place a service call or get a new model. Remember to contact the appropriate repair person if you can’t correct the issue yourself. Hopefully, your ice maker will be producing ice again in no time!
Ice Maker Repair FAQs
Should you have any remaining questions about how to repair an ice maker, check out some of these FAQs below.
What Should You Do if Your Ice Maker Won’t Stop Producing Ice?
If too much ice comes out of your ice maker, you may have a broken or detached fill bar. Test the arm by moving it up and down. If the ice doesn’t stop when you lift it, unplug the fridge and contact a repair person.
Is It Dangerous to Repair an Ice Maker Yourself?
It depends. If your issue is electrical, you should contact an electrician before attempting to repair a disrupted power line. However, the repair is simple if you have an expired filter.
Paul is the type of person who never met a problem he couldn’t fix. He can always be found tinkering with something in his house, even if it isn’t broken! His tips and tricks are often shared on our site. He’s the one you call when something breaks because he has been known to improvise fixes for everything from leaky faucets to malfunctioning dryers.