Last Updated on
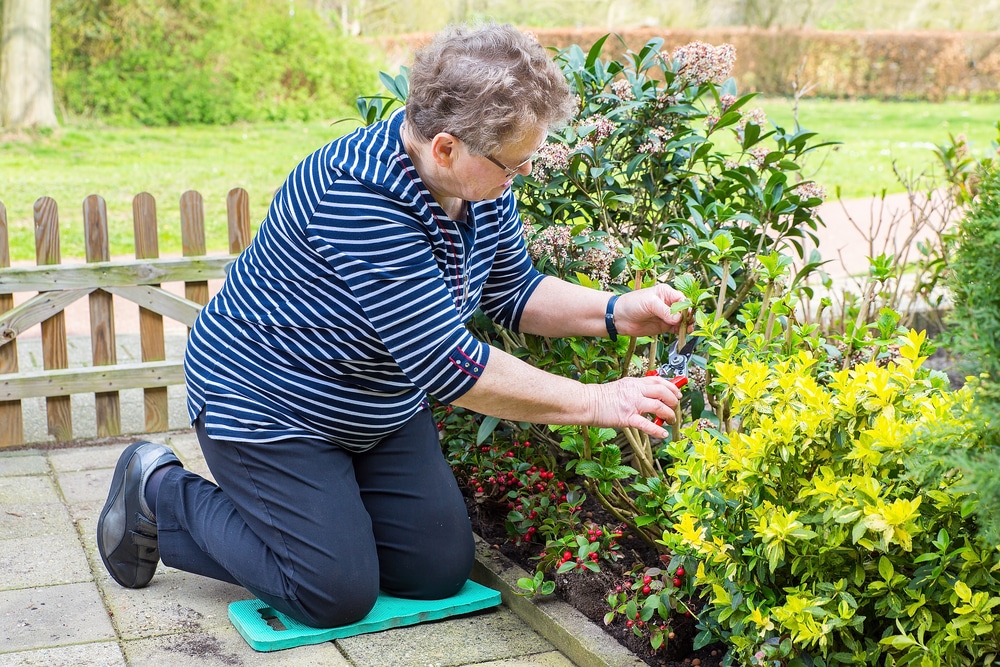
If you’re an avid gardener but have been experiencing stiffness when you’ve been sitting or kneeling to work on your flower beds, then you may require a garden kneeler, also known as a garden kneeling pad or cushion pad. These gardening accessories cushion your knees and support your body so that you can keep your garden in great shape.
You can buy an already made garden kneeler, but they are also very easy to make yourself. So, in today’s article, we’re sharing a step-by-step guide on how to make a garden kneeler.
What Are Garden Kneelers For?
A garden kneeler is a great addition to your gardening habits as it provides comfort and relief to your joints. As a result, you can spend more time in the garden or on uneven surfaces without pain and discomfort.
They’re specially designed for outdoor use and padding your knees, so don’t be precious about them, as they are made to get dirty. You may even find that they make a great gift for gardeners to add to their gardening tools.
How to Make a DIY Garden Kneeling Pad
Making a garden kneeler is not very difficult and can be done in a few easy steps. To make your own, you will need:
- ½ meter of oilcloth
- ½ metre of fabric
- Thick foam piece
- Sewing machine
- Thread
- Tape measurer
- Scissors
#DIYscoveries : #Quick and Easy DIY Garden Kneeling Pad https://t.co/K04mqznKx9 pic.twitter.com/nQeGivKagV
— Vilo Kanis (@roofingchild) May 2, 2016
Step 1: Cut the Oilcloth and Fabric Into Pieces
Firstly, cut the oilcloth and fabric each to 29 cm wide x 50 cm long. Then, cut another piece of oilcloth into 12 cm wide x 30 cm long.
Step 2: Connect the Fabrics Together
Place the three pieces of fabric on top of each other, connecting or clipping them in the top right corner. Pin the corners together throughout the top and side so that the pieces are secure and the edges stay in place. Then, sew three sides together around 3 cm in from the edge to leave a margin.
We recommend you use a sewing machine for this type of project, as the stitching will be more secure, thereby retaining the kneeler’s filling better.
Step 3: Cut the Foam and Place it Inside
Cut the stuffing to snuggly fit the inside of the fabric you have just sewn together. Use a tape measurer to make accurate measurements.
Using the final side that is not yet sewn shut as an entrance, place the foam inside, being careful not to flatten it too much. You’ll likely have to make several adjustments and gently wiggle the filling into the case without undoing any stitching.
Step 4: Sew the Open End
Now that the foam is securely inside, it’s time to sew up the final hole using your sewing machine. Ensure that you have at least ¼ inch gap to the edge to prevent the foam from ripping open the stitching.
Factors to Consider
To customise your garden kneeler, there are some additional factors you’ll want to consider that you can add to your project.
Materials
Opt for waterproof fabric or PVC fabric that’s durable and weather resistant. In this way, the kneeler won’t be ruined if you’re working on muddy soil or it begins to rain. What’s more, you can even wipe the surface clean with a damp cloth to improve its longevity.
You also want the fabric pieces to be soft and comfortable—especially if you know that you’ll be working in your yard for long periods of time, so consider how it feels against your skin.
Get those autumn garden chores ticked off in style with our hard wearing and practical natural suede gardening gloves, waterproof canvas kneeler and wire work string holder. #supportsmallbusiness #shoplocal #tenterden pic.twitter.com/zy0BgM7ECY
— Bourbon Rose (@bourbonrose2007) September 19, 2020
Stuffing
The stuffing material and quantity make a big difference to your comfort and the support the garden kneeler offers. If the cushion isn’t padded enough, you might find that your joints are still painful and achy after being outdoors. We recommend opting for a memory foam filling to make a garden kneeler supportive and able to adapt to your body.
Fave gift: Memory foam garden kneeler—like kneeling on a cloud! #gardenchat #gardening
— The Green Queen (@GreenQueenofMod) December 26, 2014
Various Types of Garden Kneelers
Although the above DIY kneeling pad instructions focus only on making one type of garden kneeler, there are several variations you can consider.
Pillow
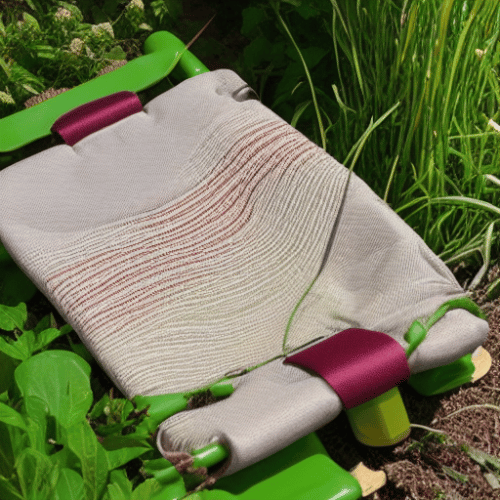
This is the type of garden kneeler we described for you above. They are often lightweight and padded, with a hanging hold or handle attached for convenient storage and transportation. Many pillow kneelers feature a single layer of cushioning. You will, however, also find some that include multiple layers or even a memory foam lining.
Got a new pillow? Use your old one as a garden kneeler. #tips
— Bed Bath & Beyond (@BedBathBeyond) July 23, 2013
Knee Pads
Replicating shin pads, knee pads are placed over your knees to provide hands-free carrying. They’re great for providing maximum comfort on your knees and can be used in conjunction with a pillow. Best of all, this gardening accessory is easy to move around since the knee pads are attached to you, so you don’t have to move an object.
Knee pads either come as slip-on, meaning you slide them over your foot and up your leg to your knee. Or they come with a velcro closure so that you can quickly wrap it around your knee without having to take your shoes off.
Went to go work in the garden, carried my knee pads upstairs, and the wife renamed them “Pence Pads”. pic.twitter.com/sai0pyme0Q
— RickJ2 (@RickJ210) March 27, 2020
Stool
Another option is a stool with a pillow attached to its frame. When placed on the ground with their legs in the air, gardening stools can offer you a great way of supporting yourself if you struggle to lift yourself from a kneeling position. You can also flip the stool the other way to easily reach surfaces and plants higher up, making it versatile for all aspects of gardening.
Handle
Consider the importance of transportation with your garden kneeler. Do you want to include a handle that makes it easier to pick up and take around the garden with you? Or perhaps you’d like to hang the garden kneeler on a hook in the shed after each use. These are important considerations to bear in mind while you craft this project.
Size
To know how to make a garden kneeler effectively, you might need to take some measurements to create a size that’s right for your body. It should be big enough to rest both knees while providing some leeway for you to move from side to side. Think about if you’ll share the garden kneeler with anyone else and consider their measurements, too.
Washable
Finally, another factor to consider is whether the garden kneeler is washable. Many find that it is much easier to throw it in the washing machine than to hand wash it. Remember that this accessory will easily get dirty during use in your garden, so you’ll need an efficient and quick cleaning method. We recommend avoiding using materials such as wool, viscose, polyamide and leather. These fabrics require special treatment and are difficult to keep clean.
Mr Shed came home with a new garden-kneeler I asked him to get from the garden centre. It's a bit fancy, over-the-top floral. It'll be filthy after 5 mins in the garden. Does anyone wash these things, coz I don't.
— ★ Ms Potting Shed (@MsPottingShed) February 27, 2019
Caring For Your Garden Kneeler
Now that you’ve gone through the efforts of learning how to make a garden kneeler, it’s time to care for it properly with these tips:
- Wear soft clothing to prevent rubbing or tugging against the fabric
- Check the corners for any sewing needs after each use
- Wipe off any dirt and debris after using it in the backyard
- For long-lasting use, place it on a tarp or other waterproof material when using it on wet surfaces
- Store it upright or hanging off the hook to keep it in shape and allow any loose debris to fall off
Tired of kneeling in the mud while you plant trees? You may want to think about using some knee pads, a garden kneeling pad, or even a small sitting pad!
— Friends of Trees 🌳 (@FriendsofTrees) January 30, 2021
✨#treeteamfriday pic.twitter.com/xVjZmxTewq
Creating a Garden Kneeler
Dive into making your DIY gardening project with a kneeler. Choose your fabrics wisely, focusing on both comfort and support. You can stitch fabric pieces together by hand or using a sewing machine. If you have any handy tips to share, let us know in the comments below. We’d love to hear from you!
Amy is a U.K.-based writer and editor with a penchant for helping consumers find the best home products for their needs, as well as providing easily digestible guides for living better at home. Her dedication to her work means she can usually be found elbow-deep in research or hunting down samples of the latest and greatest on behalf of her readers.
An avid DIYer herself, Amy’s passion lies in teaching others how they too can achieve their dream homes by tackling some of those pesky projects themselves! Whether it’s building furniture from scratch or turning an old dresser into a coffee table, Amy is always happy to share what she knows about making your house feel like home without spending a fortune.