Last Updated on
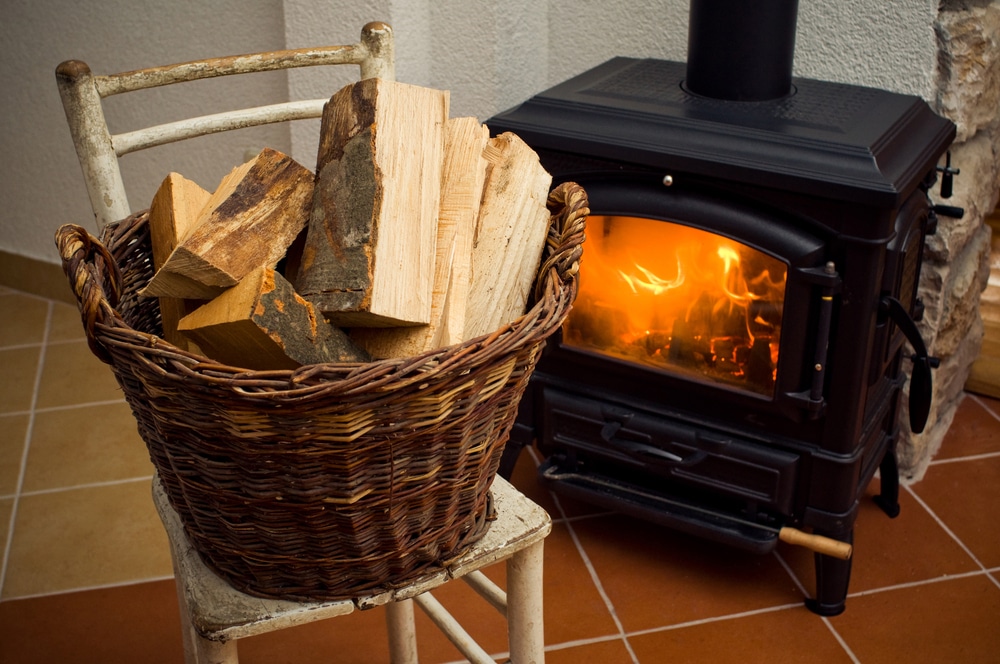
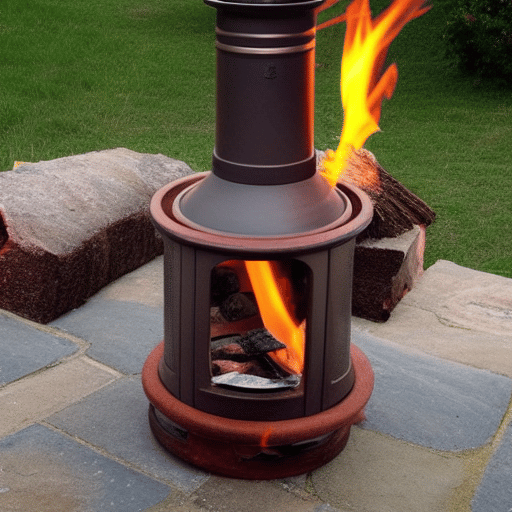
A chiminea is a popular garden feature with which you can start a fire to stay warm, cook marshmallows, or as an alternative to a fire pit. Knowing how to use a chiminea is going to be easier than you may have initially thought. However, several important points to keep in mind before you dive in and create that roaring fire.
Why Use a Chiminea?
So, why would you go ahead and use a chiminea in your garden? Well, there are several reasons.
First, they give off an amazing amount of heat. Next, as they are hot, a chiminea can be used for cooking. But, if you are to do so, install a grate in the inner section of the chiminea.
You can cook in either a clay chiminea or the metal version, but use a normal fire instead of charcoal for reasons we will get into later on.
Getting Started
The first thing to mention is that the following steps will apply, whether using a cast iron version or a clay chiminea. The basic principles remain the same when dealing with this particular outdoor fireplace.
But we will take you through a few steps that you need to follow to get the most out of your chiminea. This is something that won’t take long as using a chiminea is easy.
Step 1: Setting up Your Chiminea
Whether you are looking at doing some chiminea cooking or using it as a standard fire pit, you need to do a few things regarding setting it up.
You must place it on a flat surface and position it where you think it’s going to be staying. Don’t have it close to anything that could catch fire or near a fire hazard. After all, safety is important even when dealing with a small, contained fire.
Using a chiminea on an uneven surface is asking for trouble and must be avoided at all costs.
Step 2: Consider the Space to Heat
Both clay chimineas and cast iron chimineas are capable of providing warmth over a large area. Consider the positioning to make sure it’s going to heat the space you want. This permanent position is important since they do get heavy and can easily crack if you move them too often and drop them.
Look at the positioning first, and then move the chiminea into place.
Step 3: Preparing the Chiminea
Next, you need to start to prepare the chiminea. If you have used it before, then there’s an important step to kick things off.
First, you need to remove the old ash from inside the chiminea. Also, remove any other debris inside as that can negatively impact how well your chiminea then works. Do this before trying to light a fire.
After clearing out the old ash, check for any cracking in the base. The warmth from the fires can eventually cause problems if you do not put the correct layer into the chiminea. Considering you will have fires burning away, making sure that red hot ash cannot fall out is very important.
Step 4: Use Sand or Gravel
It would help if you also looked at putting some gravel inside the chiminea. Alternatively, placing a few inches of sand inside a chiminea will also be a good idea.
If you do decide to use sand, then make sure there are at least four inches of it in the base of the chiminea. This will help eliminate the amount of smoke that will then come out of the chiminea when you even have a small fire going.
Step 5: Remove the Lid
If you have a lid, then remove it from your chiminea before you try to light the fire. This is because the lid will stop air from getting to the small logs and find that even trying to get small flames started will prove too difficult.
However, you do need to replace the lid once the fires are out. It will stop the chamber from being flooded by the weather, making it harder to get that initial flame going the next time you go to use your chiminea.
Step 6: Check the Grate
If your model comes with a grate, then make sure it’s in place before you start to load your chiminea with some dry kindling. This will make the process of dealing with the fire a whole lot easier.
Step 7: Lighting the Chiminea
Now we go onto the actual main event, and that is how you will carefully light the chiminea. One thing you don’t do is go all out to create a larger fire. Instead, be sensible with your chiminea. For this, you need to get some material to burn, and there are several options out there.
Step 8: Using Kindling
You need to get that fire started and get things burning, and to do so, you must look at using materials such as old newspaper or pieces of bark. Those materials are easier to light, and they can then create a stable base for the rest of the fire to then develop from.
Step 9: Placing of Material Is Key
You need to spread this material around the inside of the chiminea chamber. Light the material at different locations, and then when the material is starting to burn, bring the kindling together to create a pyramid shape.
By doing this, you should be able to create enough heat via the kindling burning all on its own. The flames will start to build, but they will still be under your control.
Step 10: Do Not Smother the Fire With Wood
You mustn’t smother the fire with wood. You may think that throwing more fire logs onto the flames will help, but that’s not the case.
Step 11: Building a Bigger Fire
But what if you want to build a bigger fire? It would help if you waited about an hour after getting the kindling started before you tried to throw in more wood and get those high temperatures.
When doing this, start with small logs and build up in size. That is the only way you will be able to achieve a satisfactory burn level with your chiminea.
Step 12: Keeping It Warm
So, you have the fire going along nicely, so what do you do to keep it warm? After around another hour, you should have some white-hot embers sitting inside the chiminea. When you have them, keep moving them around as this will allow air to get in and keep the fire burning.
If you do all of this right, then your chiminea will burn adequately for around 12 hours or so. Also, it should be able to do this without throwing out too much smoke.
Tips to Keep in Mind
We also have many important tips that will keep you on track when it comes to using clay chimineas.
The Use of Fire Logs
You may want to use fire logs, and they can certainly make life a whole lot easier when it comes to getting things to burn. However, while they are useful, you perhaps want to take a moment to think if they are the correct burning solution for you.
Using Seasoned Logs
Seasoned logs will prove to be the best option if you want to turn your chiminea into a fantastic wood-burning stove. They are easy to light, and they will burn for an extended time without throwing up too much smoke or charcoal.
If you want to create a normal fire, then seasoned logs will work well. However, you do need to use kindling wood before you throw in the logs. This wood comes in later on in the process to help keep those embers burning for as long as possible.
Chemical Firelighters
To get the wood-burning, whether it be in clay or metal chimineas, you need to use firelighters. However, we would recommend not using chemical firelighters for one simple reason.
They will generally emit an unpleasant chemical smell. It won’t be toxic, but it’s just not nice. Instead, go for natural firelighters as they will still work, and you won’t be left with that odour in the air.
Added Safety Concerns
Please do not use liquid fuel at any point. This is dangerous and should always be avoided. This applies to not only the larger clay chimineas but any version on the market. There is a chance that the fire will not only create too much smoke, but it will quickly grow out of control.
Caring for Your Chiminea Properly
Caring for a Clay Chiminea – Clay chimineas require special care in order for them to function properly and to remai… http://ow.ly/19jQ8r
— Hannah Sebestian (@HannahSebestian) October 6, 2010
Finally, you need to understand how to care for your chiminea properly. Chiminea care is easy. Make sure it remains on that level surface, check each part is adequately sealed, and look for any blockages or build-up of ash in the chimney.
Also, it would help if you remembered that a chiminea would get hot, so don’t touch the clay or metal until the following day.
Remember to clear out the old ash before using it again and throw in four inches of sand before building a fire. This will stop the base of the chiminea from cracking due to the heat.
Using Your Chimnea
As long as you look after it and learn how to use a chiminea correctly, your chiminea is going to last you for years. Get the right wood, build the heat gradually, and enjoy the heat that comes from a chiminea in your garden. You will then be able to enjoy your outdoor space even at night or when the temperature dips, and that is a wonderful thing to have in your home.
Paul is the type of person who never met a problem he couldn’t fix. He can always be found tinkering with something in his house, even if it isn’t broken! His tips and tricks are often shared on our site. He’s the one you call when something breaks because he has been known to improvise fixes for everything from leaky faucets to malfunctioning dryers.