Last Updated on
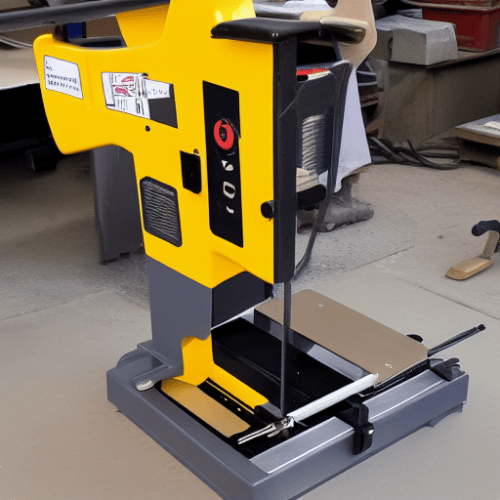
A band saw is a powerful, versatile, and multi-purpose tool which comes with a blade that can cut through different types of materials, such as metals and wood.
Whether you are planning on working on wooden materials or metal, a bandsaw can help you make curved cuts or straight cuts on different items. Additionally, there are a variety of blade sizes that are ideal for doing various tasks. This post will show you how to use a band saw to tackle all of your DIY tasks. Let’s dive in.
Different Sizes
Band saws are available in a variety of designs and dimensions, making them perfect for working on multiple accessories. The distance on the saw’s throat can hold different types of blocks. However, a larger throat can accommodate large woodblocks.
Moreover, the size of various band saws is measured in inches. For instance, one of the most popular bandsaw sizes is the 14-inch saw. Other sizes are between 10 inches and 21 inches.
I need to use a band saw today does anyone have a band saw I could use for 5 minutes?
— Wade (@wavefornachot) March 27, 2021
Blades are categorized based on the number of teeth per inch. The tooth on a saw blade may also have a unique design. Not to mention, there are multiple types of bandsaws, such as benchtop saws.
Different Parts of a Bandsaw Machine
Before we dive deeper into this, we will take you through the different parts of a bandsaw, making it easier for you to know how you will use it while working on different DIY tasks.
Frame

This is the outer part that holds all the other parts together. Examples of such parts include saw blades, motors, and pulleys. The frame of a band saw might be made from different materials like aluminium, plastic, and steel. On rare occasions, the frame might be manufactured from wood.
Motor
A motor powers the whole band saw, triggering the cutting motion of the blade. Moreover, bandsaws have motors that have different amperage ratings. The most common amperage rating is 2.5 amperes.
Motors that have a high amperage rating are more powerful than motors that have a low amperage rating.
Blade
Most band saws feature a thin, long, and sharp blade, which is quite effective in making cuts in various types of materials. Band saws use different wheels to move blades. The wheel size might differ from one saw to another.
A piece of pine is turned into wave blocks with the use of a bandsaw and sander. pic.twitter.com/1sp08qGoOg
— Kelly Wright (@Kelly_M_Wright) October 22, 2016
Dust Ports
As the name hints, dust ports are special parts that eliminate the waste dust that might be produced as you are cutting wooden planks.
Foot Brake
A foot brake makes it easier for you to stop the blade as you work on different wood accessories.
Guides
Guides can maintain the blade in a certain path, improving the accuracy and precision of various cuts.
Having to use a band saw this early in the morning gives me more anxiety than anything tbh
— Mikey met Eef !! (@driftinggalaxy) March 1, 2021
Pulleys
Pulleys rotate the belt in a specific direction, determining the cutting speed of the blade. When the pulley rotates at high speed, the blade becomes stronger. On the other hand, if the pulley rotates at a low speed, the cutting power of the blade will be diminished.
How to Use a Band Saw
Setting Up
For a band saw to cut effectively, you have to set it up correctly.
Start off by unplugging it from the power supply. After that, you have to unfasten the tensioner before you set up the blade. Fix the blade on the bottom wheel of the band saw, then fix it on the other wheel. Fasten the tensioner, then tilt the knob until the blade rests in between the wheels.
Since band saws have different designs, you have to read the manufacturer’s guide to know how you will change the blade tension depending on the blade width.
Cutting
Before you start cutting a wooden plank with this tool, you have to move the blade guard up or down based on the piece you are working on. For instance, if you are working on a thin wooden plank, you have to move the guard downwards until it’s close to the wooden plank. However, you have to leave some space between the guard and the workpiece you plan to cut. A guard covers the blade, minimizing the risks of any injuries.
Look For the Right Blade
A band saw can make various types of cuts on multiple wooden planks and have multiple numbers of teeth per inch. Due to this, you have to choose a saw blade with the right number of teeth based on the type of cut you plan to make. The right type of bandsaw blade will cut wooden blocks easily.
If you plan to cut vertically through a workpiece, a wide blade might be suitable for you. On the other hand, a half-inch wide blade might be ideal for a general cut.
Anyone have a strong recommendation on a band saw with a good fence? Or, anyone in the Twin Cities have a band saw they want to sell? Alternatively, have a band saw I can use for a few hours next week?
— Grant Wood (@smackthud) March 17, 2021
tl;dr in market for bandsaw
Cutting Curves and Circles
While a woodworking jigsaw might be suitable for cutting different types of curves on the edge of wooden planks, it displaces dust on the upper part of a wooden surface. On the other hand, a band saw can make cuts on wooden blocks, displacing the sawdust on the lower side of the planks, making it easier for you to see what you are cutting. Thin blades are a good option for tighter curves.
Mark the Wooden Section With a Curved Line
Start off by marking the section you want to cut with a bandsaw using a pencil. For instance, you can place a curved item on the surface of the wooden plank and then draw the curved line on the wooden board.
Cut
Once you finish drawing the outline on the wooden plank, turn on the bandsaw and place the board on the surface of the bandsaw.
Hold the wooden board in a strategic position, keeping your fingers away from the blade. It is a safety measure that reduces the risk of bandsaw injuries. After that, move the wooden plank until it comes into contact with the bandsaw. Guide the wooden plank through the saw, following the curve line you had drawn earlier until it makes a curved cut.
If you are planning to make curved cuts on multiple planks of wood, you can place the wooden planks on top of each other. The topmost plank of wood should have the outline of the curve that you are planning to make. Once you finish placing them on top of each other, guide them through the bandsaw, following the curved outline.
Resawing
The resawing technique makes it easier for you to cut straight through a thick stock to get multiple wooden planks of the same width.
Learning how to use a bandsaw in Technology class! #ShadowaStudent pic.twitter.com/timWqmBvKU
— Alaina Trott (@AlainaTrott) April 10, 2019
Mark the Timber
Before you begin this process, you have to mark the point that you will cut through to get different wooden planks. For instance, you can use a pencil to draw a mark on the centreline of the wooden plank that you will work on. Make a mark on the thick edge. If the pencil mark is not clear enough, you can use another tool to draw a clear mark on the wooden plank. For example, a sharp utility knife might be ideal for such scenarios.
Move the Guard Upwards
Once you mark the section you are going to cut through, move the blade guard up to get enough space to cut through the wooden plank.
However, the blade guard position should be changed based on the size of the wooden plank that you are cutting. Adjust it properly to accommodate the material that you are working on.
Move the Fence Close to the Saw Blade
A bandsaw fence effectively guides a wooden plank in a certain path, making it easier for you to make different cuts.
Adjust it and move it towards the blade, leaving enough space to fit the wooden plank you are planning to cut.
Today, students learned how to use a bandsaw. This young man is cutting out his CO2 race car. #STEMeducation #raidermakers #nfldedu #shopclass pic.twitter.com/LAQkKUfzP8
— Steve Taggart (@SteveTaggart4) April 8, 2021
Make the Resaw Cut
Place the wooden plank against the bandsaw fence. The bandsaw blade should come into contact with the mark on the centre of the wooden plank. Also, you can place a feather board on the table and then apply some pressure on the material you are working on.
Turn on the bandsaw, then move the wooden plank properly through the blade to cut through the thickness of the plank. Just apply some light pressure on the wooden plank, then move it slowly to get superb results.
If you move the wooden plank too fast, the bandsaw blade might wander off from the centerline. Keep on moving the wooden saw until the blade penetrates through the thickness completely.
Making Notches Using a Band Saw
There are various band saw uses; one of them is making notches. Cutting a square notch using other woodworking power tools might be quite challenging and dangerous. With a bandsaw, you can easily cut clean and high-quality square notches on different wooden blocks.
Mark the Wooden Plank
Use a pencil, a ruler, and a marker pen to mark the area you will cut. Just draw the lines that are going to guide you while you are cutting the notch.
Change the Position of the Blade Guide
Move the guide downwards or upwards, depending on the thickness of the wooden plank.
Cut
Place the wooden block on the table of the band saw, then align it with the blade of the saw. Turn on the band saw, then push the wooden plank through the blade, guiding it through the line you drew earlier. Once the blade penetrates through to one end of the notch, start working on the other part.
#NewSkills Learned how to use a bandsaw today. #Funemployment pic.twitter.com/cD1pG6HeaT
— Diana West (@dmabelwest) July 6, 2020
Cut With a Bandsaw
And there you have it, everything you need to know about bandsaws and how to cut wooden blocks with such saws. Since blades have different teeth, you have to opt for a blade that is ideal for the cut that you are planning to make. A bandsaw helps you make a wide array of cuts, such as straight and rounded cuts.
Furthermore, make sure that the saw has superb tracking to get clean straight cuts. Also, the blade tension should be suitable for tackling different tasks.
Ian loves everything that revolves around the home improvement niche. He loves trying out new home appliances. He has also handled a lot of equipment and has a lot of insight. Plus, he’s worked on various home improvement projects that became a success.
If Ian isn’t busy working on his latest project, you can find him reading up about another one!


