Last Updated on
Are you looking to spruce up your garden with a fresh coat of fence paint? Whether it’s for aesthetic reasons or to protect your wooden fencing from the elements, thinning out your fence paint is an important step before using a sprayer. But how do you go about diluting it correctly? We have all the answers and more in this guide on how to thin fence paint for a sprayer. Here we’ll cover what materials are needed, mixing instructions, testing tips and application advice – so get ready to take notes if you want perfect results every time.
Table of Contents:
What You Need
When it comes to thinning fence paint for a sprayer, there are certain materials and tools you need. A bucket is essential for mixing the paint and thinner together. You’ll also need a stirrer or stick to mix them together properly. Paint thinner is necessary in order to get the right consistency of your mixture; without it, your paint won’t be able to flow through the nozzle of your sprayer correctly. Lastly, you’ll want a measuring cup so that you can accurately measure out how much thinner needs to be added to the mixture.
Once all of these items have been gathered, make sure they’re clean before use as any dirt or debris could affect the quality of your finished product. Now that everything is ready, pour some fence paint into your bucket and add an equal amount of thinner according to what’s recommended on its label – usually between 10-20%. Stir this mixture until it’s evenly blended then test its viscosity with a stirrer or stick by dipping it in and pulling it back out again; if the liquid clings onto it like syrup then you know you’ve got just about the right consistency. If not, adjust accordingly by adding more thinner until desired results are achieved.
Finally, when applying this thinned-down fence paint with a sprayer always remember safety first. Wear protective clothing such as gloves and goggles while spraying outdoors away from open windows or doors – especially if using solvent-based paints which contain hazardous chemicals that can cause serious health problems if inhaled or ingested.
Mixing Instructions
Mixing paint with thinner is an important step in the painting process. It’s essential to get the proportions right, so that you don’t end up with a runny or lumpy mess. Here are some tips on how to mix your paint and thinner correctly:
1. Measure out the correct amount of each ingredient using a measuring cup. Generally, for every gallon of paint, you’ll need one quart of thinner.
2. Pour both ingredients into a separate container and stir them together slowly but thoroughly with a stirring stick until they’re fully blended together without any lumps or streaks remaining in the mixture.
3. Once mixed, test it by applying it onto a small area first before starting your project – this will help you ensure that everything looks even and smooth when applied onto larger surfaces like walls or furniture pieces later on.
When applying your mixture to larger areas, use long strokes in one direction only; this will help prevent streaking and give you an even finish overall. Also make sure to keep moving while painting – if you stay in one spot too long, it can cause unevenness as well as brush marks on your surface once dry.
Testing
Testing the consistency of a mixture is an important step in ensuring that your home and garden products are up to par. To test the consistency, you’ll need to spray it on a piece of cardboard or other surface. Start by spraying a small amount onto the cardboard from about 12 inches away. If the product sprays evenly and doesn’t run off, then it’s ready for use.
If there are any runs or drips, this means that your mixture is too thin and needs more thickening agent added. You can also adjust the nozzle on your sprayer if needed; if it’s set too wide open, you may end up with too much liquid coming out at once. Make sure to check this before continuing with your project.
Once you’ve adjusted the nozzle and/or added more thickener as necessary, repeat testing until you get an even coat without any runs or drips. This will ensure that when applied to whatever surface you’re working on (wooden decking, stone walls etc.), it won’t drip down unevenly and create unsightly streaks.
It’s also important to note how quickly the product dries after being sprayed onto cardboard – this will give you an indication of how long it takes for each layer of coating to dry completely before applying another one over top (which should be done within 24 hours). If drying time seems slow or inconsistent between layers, consider adding some accelerant such as alcohol-based spirits which can help speed things up considerably.
Finally, don’t forget about safety precautions when testing mixtures – always wear protective gear such as gloves and goggles while handling potentially hazardous materials like solvents or paint thinners so that no harm comes to yourself or anyone else nearby during application processes.
Application Tips
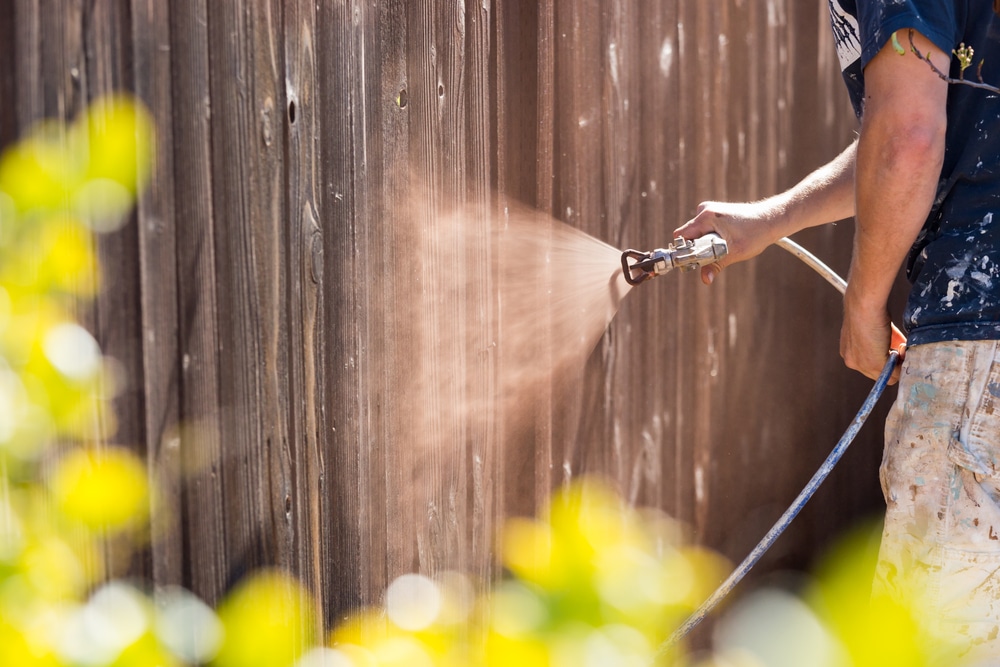
Spraying paint can be a tricky task, but with the right application tips you’ll have no problem getting the job done. To begin, make sure to thin your paint according to manufacturer instructions. This will ensure that it sprays evenly and smoothly. Once you’ve mixed your paint correctly, it’s time to start spraying.
When using a sprayer, always wear protective gear such as safety glasses and a respirator mask. This is especially important when working with oil-based paints or primers which contain potentially harmful fumes. Also keep in mind that painting outdoors requires more ventilation than indoors due to increased exposure to wind and other elements.
It’s also important to adjust the nozzle of your sprayer for optimal coverage; this will depend on what type of surface you are painting (smooth vs rough). For example, if you’re painting a textured wall then use a wider fan pattern so that more paint gets into all those nooks and crannies. If you’re coating something smooth like metal or plastic then opt for a narrower fan pattern instead – this way less overspray occurs which saves time and money in the long run.
Conclusion
By following the instructions above on how to thin fence paint for a sprayer, you can now successfully do it on your own. You’ll be able to get the perfect consistency for your project and achieve professional results. Remember to always test before applying, as this will ensure that you have mixed it correctly and are happy with the outcome. With these tips in mind, you should be well on your way to creating beautiful outdoor spaces with ease.
Paul is the type of person who never met a problem he couldn’t fix. He can always be found tinkering with something in his house, even if it isn’t broken! His tips and tricks are often shared on our site. He’s the one you call when something breaks because he has been known to improvise fixes for everything from leaky faucets to malfunctioning dryers.