Last Updated on
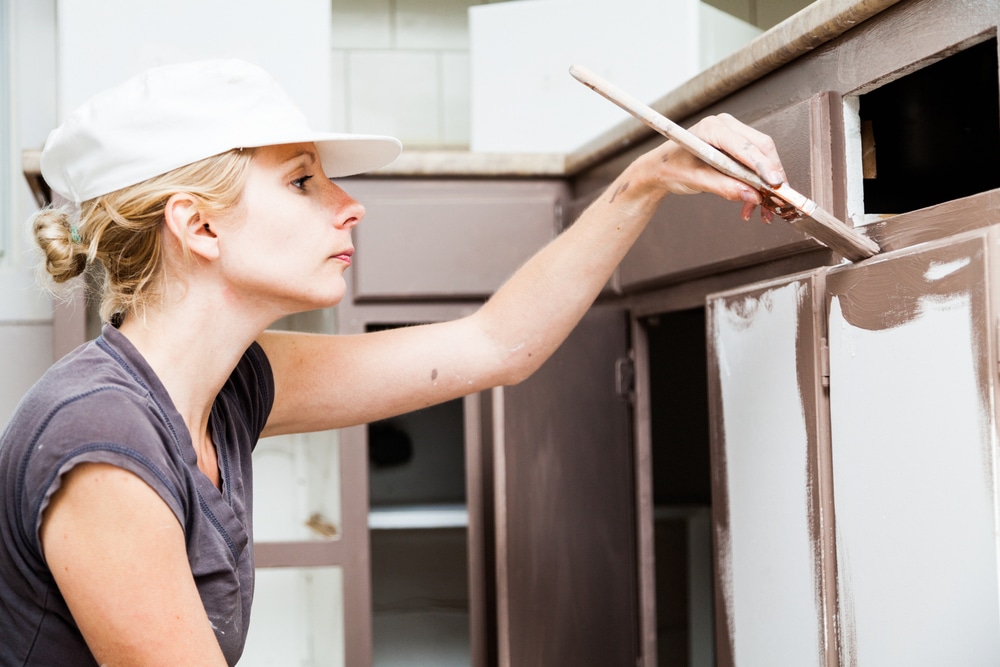
Knowing how to paint kitchen cabinets is going to involve little knowledge, few tools, and a desire to turn your kitchen cabinets into something amazing. By painting them, it means you will be able to transform your kitchen completely and even breathe new life into those cabinet doors that were looking somewhat tired and past their best.
But all of this only happens when you know what you are doing, and that’s where we are going to help. You are going to see that achieving painted cabinets with a smooth finish is relatively easy to do, as long as you follow the few steps we are about to take you through.
Can They Be Painted?
Before we dive into how to paint kitchen cabinets, let’s address something very important. Are your kitchen cabinets even able to be painted?

Now, this is going to largely depend on the state of the wood, as well as the cabinet frames themselves. If they are in a poor state, it may be easier to replace them rather than give them a new paint job.
So, check the veneers and see if they are past their best. Look for holes and cracks in your wood cabinets, as all of this plays a role in the painting process and also how things look at the end of the day.
Choosing the Type of Paint
You need to choose the type of paint, and we aren’t talking about the colour at this point. Instead, you need to know the difference between latex paint and oil paint.
Most modern paints are latex-based. Brushes can be cleaned with water, they give off fewer fumes, and your painting projects dry faster as well.
On the other hand, some argue that oil-based paints provide a more durable finish and make it easier for the paint to adhere to a variety of surfaces. Basically, it’s up to you, but if the smell bothers you, then latex will be the best paint to use when wanting to paint cabinets in your home.
Also, there’s more to think about than wet paint. Latex paints take longer to cure than oil. That means your painted kitchen cabinets could still be damaged for a couple of weeks after painting until the paint is fully dry.
Options with Applying the Paint
Painting kitchen cabinets can be done via brush or even spray. However, most people use a brush as they feel they can keep more control over it when dealing with paint.
Also, if you are not used to using a spray, then the paint can go all over the place. That means there’s more mess to deal with.
If using a brush, then go for a high-quality brush. It’s less likely to go ahead and leave bristles behind. You should also get a couple of different brushes. A 3 or 4-inch brush will allow you to paint the flat surfaces quickly. An angled brush helps you get into the corners, and if there’s any edging on the door, then an angled brush means no piece is missed.
Strip, or Not to Strip?
People wonder whether or not they need to strip the surface of the kitchen cabinets before painting. They automatically think that previously painted cabinets need things to be stripped back to bare wood, but that’s not always true.
For most people, you can avoid the stripping part.
But now, onto the actual painting process.
Step 1: Cleaning the Kitchen Cabinets
The first step is to get a damp cloth and clean those drawer fronts and cabinet doors. Creating a sugar soap solution is the best approach. Mix some in a bowl, and give everything a good scrub.
Step 2: Sanding
Before you start painting cabinets, you should give them a light sanding. This breaks up the surface of the old paint, so the new paint adheres without any problems.
Step 3: Remove the Doors and Drawer Fronts
Remove the doors and drawer fronts as you are going to paint them individually. Removing the doors and drawers makes it easier to inspect the edges and doors for any faults or cracks on the surface.
Take as many pieces off as you can. It will speed up the painting process if you have the space available to line up the various pieces.
Step 4: Repair any Damage
Before you start painting those cabinets, make sure you check over each surface for any damage. Check the edges, and use some wood filler to fill in any cracks or holes. If you do use wood filler, then make sure you lightly sand those areas once it’s dry to get everything nice and smooth.
You should also look at removing the hinges at this point as well. It just makes it easier to paint when the hinges are off, as they can get in the way.
After this, make sure everything is dust-free by wiping it down. Use a tack cloth for this, but don’t soak the surface. It will just mean you need to wait for it to dry off before you can then go on with the next step.
Step 5: Prime Everything
Your first coat is not of paint. Instead, you need to use a primer on your cabinets, doors, and each drawer. When priming, you should start with the middle panel and then work your way to the edge. Make sure you are using the right primer paint for the wood or material for your doors.
At this stage, you still need to think about the wood grain. Start by going against the grain before you, then finish things off by softly bringing the brush along with the wood grain. Do this in a single stroke from top to bottom, and don’t stop.
It’s then important for you to let the primer dry completely before you move onto the next step.
Step 6: Another Sanding
If you are going for that smooth finish with your kitchen cabinets, then you should give the cabinets another light sanding after the primer is completely dry. You may want to use something in the region of 220 grit. After sanding, wipe it all down again before you move on to the next step.
Never forget to wipe things down with a slightly damp cloth. The dust created by sanding will stick to the paint, and it’s amazing how it will stand out even through the next coat of paint.
Step 7: Preparing for Paint
You are now ready to actually start painting kitchen cabinets. Now, if you are using the same kind of colour as the existing paint, then there is a chance that a single coat will do. However, do prepare for two coats, just in case.
Make sure you have enough paint to cover all the surfaces before you begin. There’s nothing worse than finding you don’t have enough paint forcing you to run out and get some more while hoping they still have the colour in stock.
Also, one extra tip is to use a brand new brush when you are adding a new coat. It just helps to make things neater.
Step 8: The First Coat
After checking you have the right paint for your kitchen cabinets, you need to add the first coat. If using a roller, then watch out for roller marks being left behind. They will stand up and be very prominent, making it harder with the next coat of paint.
Don’t try to save time by rushing. That’s going to leave too many brush marks, and then you need to hope the second coat covers them up for that smooth finish to your cabinets.
As with the primer, you want to do long brush strokes going against the grain to get the paint to cover the wood. Don’t be mean when painting, as it simply means you will need to do extra coats to get the right coverage.
Once you feel that there’s enough paint on the surface, do those long strokes in the direction of the grain to get the sleek finish on your doors.
If the door has panels, begin painting the area that goes around the panels. You then need to move to the interior before rounding it off with the rails and the edges.
Step 9: Preparing the Second Coat
Before you paint the next coat, make sure the first one is completely dry. You then need to go back in with some sandpaper and give everything a light sanding once more. This does help your cabinets to have a sleek finish as you work on the different coats.
If you try to paint when the first coat is still wet, it could create lumps.
Step 10: The Second Coat
Painting the second layer is going to follow the same method as what you have done before. Do remember to use new brushes as it does make painting those cabinets a lot easier and leaves a smoother finish.
If it looks like this is going to be your topcoat, then take extra care with leaving any marks behind. You need this to be as smooth as possible, as it’s pointless painting cabinets to see streaks, drips and marks then. It just ruins the final product.
Step 11: Putting Everything Back Together
Finally, you want to put everything back together. That means putting the pulls and each hinge back on the doors before putting them back on the cabinets.
You should be able to stand back and admire your work, but keep in mind that the paint needs to dry thoroughly before you start putting things back in the cabinets.
Additional Tips to Remember
There are several additional tips to keep in mind.
Painting the Inside of the Cabinet
If you plan on painting the inside of the cabinet, and this is not something that is always necessary, then here’s a tip. Use a small roller as it leaves a good enough finish depending on the paint you are using.
Drying Time
The rate at which paint dries varies between brands, as well as the type of paint. Pay close attention to drying time before you purchase the paint, as it will also determine how long the entire project is going to take.
Consider Semi-Gloss for a Shiny Finish
If you want that slightly shiny finish without going over the top, then semi-gloss paint is the way to go. It does mean it will reflect light, but you do need to be confident when it comes to the actual paint. If you are unsure about your technique, then it’s best practice to make sure you don’t leave streaks. It will be extremely visible when using this type of paint.
Never Rush Things
The final tip is to never rush this process. The best way to paint doors and cabinets is to be slow, steady and smooth. That will reduce the chances of leaving marks that will really stand out when you put the doors back onto the cabinets.
Also, keep in mind that even the inside of the bottom cabinets should be painted smoothly. You are best to take the same approach on applying paint no matter where it is located. Consistency makes the entire kitchen look better.
Final Thoughts
So that is how you can successfully paint kitchen cabinets, and there’s nothing complicated at all in the various steps covered. The key here is to take your time with the preparation. That will then have a direct impact on the quality of the finished result, so don’t rush it.
In a matter of hours, you can have a kitchen that has been transformed, and all thanks to a coat of paint. So, save yourself the hassle and expense of ripping out the old cabinets and installing something new, and consider giving them a good paint job instead. You will be amazed at the difference it can make.
Paul is the type of person who never met a problem he couldn’t fix. He can always be found tinkering with something in his house, even if it isn’t broken! His tips and tricks are often shared on our site. He’s the one you call when something breaks because he has been known to improvise fixes for everything from leaky faucets to malfunctioning dryers.