Last Updated on
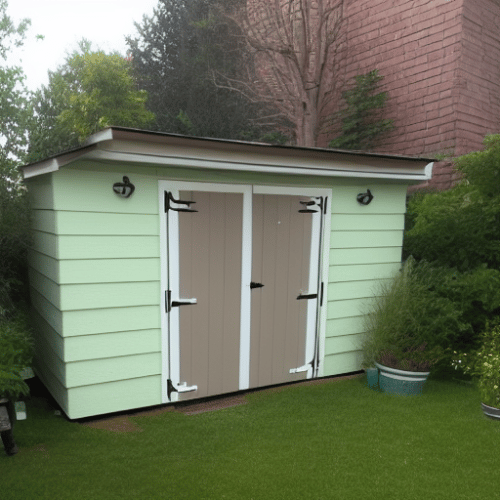
Well, paint is quite effective in sprucing up an old shed and making it look new. Plus, it helps you style up your garden shed and make it look more attractive than before. Sheds might become dull after a long period of time due to harsh weather conditions. You can use different shades of paint, depending on your personal preference. A variety of colours and tints are available in outdoor paints, making it simpler for you to give your garden some personality.
For instance, you can use a certain colour that blends perfectly with the exterior appearance of your fence, perimeter wall, or house.
Painting a shed is an easy DIY task that can be done with a few tools. We are going to show you how to paint a shed, adding some colour to make it look brand new. Let’s get right into this.
Step By Step Guide On How to Paint a Shed
Start by looking for the equipment and materials that may be needed to paint a shed.
Step 1: Clean the Wooden Surface
The surface of a new garden shed might be clean, smooth, and free from debris. However, the surface of an old garden shed may have dirt particles and other debris, which might affect the adhering properties of paint.
For the best results, you have to clean the wooden surface with different cleaning gear. Examples of such gear include brushes and detergents.
Use the cleaning gear to get rid of the dirt particles, mud, cobwebs, algae, mould, fungi, and lichen that might be on the shed’s surface. Once you finish cleaning the wooden shed, let it dry off for some hours before getting started with the paint. You may even want to do this the day before so it can dry off overnight.
You should trim any tall grass that might be close to the shed, too.
Step 2: Use Masking Tape
Wait for the shed’s surface to become dry. Once the garden shed becomes completely dry and free from dirt particles, you have to cover the surfaces and parts that you are not planning to paint using masking tape. Examples of such parts include windows and frames. You have to protect the plants that are around your shed too, and you can use a plastic sheet or shield them with cardboard. If your shed is on a concrete base, then you may want to lay something down to protect this, too, and avoid any paint drips.
Step 3: Make Some Repairs on the Wooden Surface
Our team of @NisaRetail volunteers are hard at work here at Inclusive at AALPS, where we’re busy painting, weeding, planting trees, repairing a shed roof and much more! Great job guys 👏 #nisavolunteers pic.twitter.com/dKFnnbaguT
— MADL (@MADLcharity) September 12, 2019
If you are using an old shed in your garden, it may have some cracks that could ruin the coats of paint during the winter season. You have to waterproof the shed’s surface before you start the DIY painting project for the best year-round results.
You can use caulk to waterproof the shed’s surface. Just apply it to the cracks and gaps that might be on the garden shed to waterproof the surface and stop water from seeping through into the wood. After that, let the caulk dry off for a few hours before you proceed to the next stage.
Step 4: Sand the Wooden Surface
Treat for myself after sanding and painting the shed – Drinking a Swish @ windrose house of beer – https://t.co/tKZdhTGF8b #photo
— Ian Stringer (@burton8493) May 21, 2017
Sand the shed’s surface to get rid of the previously painted old coat of paint, which may have faded with time. Also, getting rid of the old coat of paint makes it easier for you to apply new paint.
Use different types of sandpaper to sand down the old coat of paint and create a smooth surface for you to work on. Follow the direction of the natural wood grain to get effective results.
Afterwards, clean the shed’s surface to get rid of the flakes of paint that you might have sanded. A power washer might also be ideal for removing debris and flakes of paint from the shed’s surface.
Step 5: Apply a Wood Primer on Shed’s Surface
Colourtrend Woodcoat Paint and primer on one for exterior wood has a new no. 1 fan. So delighted with the result I got on my awful garden shed with just one coat! Water based, quick drying and sweet smelling, I just cant wait to get back out for the the… https://t.co/Xl6YCz89xK pic.twitter.com/cyTtmyjbL0
— Sharon @ Rejuvenate Interiors Ireland (@PashPainter) July 27, 2018
You have to apply a wood primer on the shed’s surface to preserve the timber and boost the adhesive properties of paint. Priming makes it easier to prepare the shed’s surface and make it ready for paint. Well, there is a wide range of different primers that can make it easier for you to apply multiple coats of paint on the garden shed’s surface, so do your research to find one that is a good product for your shed.
Step 6: Paint the Shed’s Surface
I gave a 2nd coat of paint to the final side of the shed & didn’t get any paint on myself, so it’s going well.
— I Stand With Ukraine 🇺🇸🇫🇷🇺🇦🟧🟦 (@PatResister) July 11, 2021
Before you start this shed-painting procedure, check the weather conditions. The best time to paint your shed is during a sunny day. The paint will take a short period of time to dry off in sunny weather conditions. You want to avoid painting on overcast days when there is a chance of rain as it could cause streaks, and you will only have to go over it again.
If you are planning to use a roller while painting the shed’s surface, you have to pour the paint into a large tray. After that, dip the roller in the paint, then apply the paint on the shed’s timber walls, following the direction of the wooden grain. If your shed has panels, then a wide brush may be easier and have better results.
Move from one section to another and use the same painting technique while applying paint. Once you finish applying the first coat, countercheck the garden shed’s surface to see if the paint is evenly distributed on all parts. You can also use a brush to paint hard-to-reach sections of the shed.
The first coat of shed paint should dry off before you proceed to the next painting procedure. It might take a few hours for the shed’s surface to dry off. Once the exterior surface dries, apply a second coat of paint to get an even finish and an attractive garden shed from the second coat.
Conclusion- Paint Your Shed
Paint can preserve your shed and make it look stylish. Not to mention, there are various shed painting ideas that you can incorporate to achieve a stylish design. A painted shed can withstand harsh climatic conditions while protecting the structural timber. Opt for a colour that suits you, then jump right in.
Ian loves everything that revolves around the home improvement niche. He loves trying out new home appliances. He has also handled a lot of equipment and has a lot of insight. Plus, he’s worked on various home improvement projects that became a success.
If Ian isn’t busy working on his latest project, you can find him reading up about another one!