Last Updated on
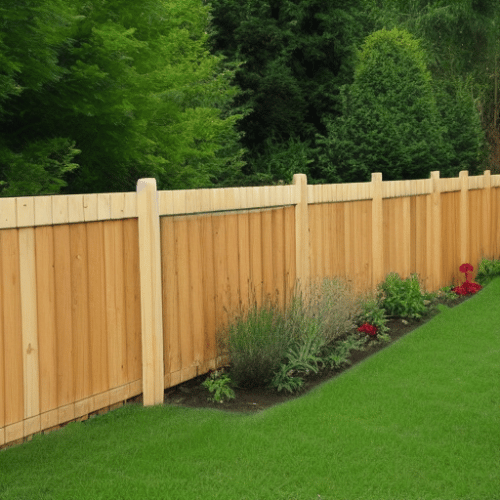
Paint is a great way to refresh the appearance of a wood fence and the appearance of your outdoor garden area as a whole. Painting your fence by hand can take a significant amount of time and effort, but fortunately, painting a fence can be pretty easy and fairly quick if you use a paint sprayer or paint spray gun to help you get the job done. In fact, painting fence panels with a spray gun can be around ten times quicker than doing so by hand with a brush. This article will teach you how to paint a fence with a sprayer and give you important paint sprayer tips to ensure you do a great job every time. Maybe it will even inspire you to stop putting off the project and get started right away.
Getting Ready to Paint or Stain Your Fence
Check the Weather Forecast
Check the weather forecast so you can schedule painting your fence for a time when there isn’t any rain expected for at least a few days. Also, choose a warm and sunny day with little to no wind for the day you paint. It will help the paint dry faster and will prevent the spray from spreading unwantedly in the wind.
With a new wood fence, you will want to wait between two and five weeks before you paint or stain the wood so excess moisture can leave the material. It helps prevent possible warping and will ideally help the paint or stain stick better.
Start spraying your fence with paint in the early morning before the wood has a chance to heat up and become hot. If the wood is hot, it can cause the paint to dry too quickly, leaving it with inconsistencies and cracks.
Prepare the Area
Before you start painting, you will want to trim the grass and garden landscaping close to your fence. It will help expose the surface so you can access every part of the fence without any interference.
To further prepare, you will also want to repair any damaged panels in the fence and fill any cracks or holes with an exterior filler. You should also take this time to replace any damaged boards that have cracks or signs of decay. Lastly, scrape off chipping or peeling pieces of paint so that the new paint goes on smoothly and evenly.
Gather Your Supplies and Tools
To make your project go as smoothly as possible, you will want to gather all of your supplies and tools before you get started. Before you can move forward, you will also need to choose your paint colour. Make sure you choose a paint that is made for exterior wood and will work with your sprayer.
*buys fence paint sprayer*
— Helen Fitch-H (@contempl_activ) February 5, 2021
*Checks weather forecast for the next two weeks*
*Puts painting materials away again*
What You’ll Need:
- Paint
- Paint sprayer
- Pressure washer (optional but recommended)
- Face covering for safety
- Goggles or glasses for safety
- Gloves (wear them to avoid getting paint on your hands)
- Two empty buckets so you can prime the sprayer and clean up easily when done
- Spray tip extension to access hard-to-reach places like cracks and corners
- Cleaning rags
- Step ladder to access the top edge
- Extension cord
- Dropcloth or plastic sheets for ground coverage and to cover plants
- Paintbrush for touchups
- Painters tape
Using a Paint Sprayer on Your Wood Fence: The Step-by-Step Process
Step 1: Clean Your Fence
I'm being allowed to use the paint sprayer on the fence peeps whoop whoop….carnage personified… I'm soooo excited 😂😂 weapon ready..check 🙈
— Wendy Ward ❤ (@Wend3211) April 10, 2021
Wendy Ward ready….I was born ready 😂😂😂❤💪
The first step to painting your fence, regardless of whether you are using a sprayer or painting it by hand, is to clean the fence thoroughly. You can use a brush to remove dirt and your hose to get decent results, but we recommend using a power washer to get the fence extra clean and help your paint stay for as long as possible. Make sure you do not skip this step; otherwise, your new paint will start to flake and chip within a couple of years.
If you use a power washer, give the fence at least 24 hours to completely dry before you paint the wood. Any leftover moisture in the wood will prevent the paint from sticking to the surface evenly and may cause bubbles or cracks.
Once your wood fence is clean and dry, you may want to use sandpaper to smooth out the fence panels. Paint will stick to a smooth surface much better and prolong the life of the paint.
Step 2: Cover and Protect the Space Surrounding Your Fence
To complete the prepping portion of this project, move any nearby furniture and cover the surrounding fixtures and landscaping. It could involve anything from putting down drop cloths or plastic sheeting to cover the ground, shrubs, and trees, to covering brick columns, posts, and adjacent walls on your house.
Due to how a sprayer projects paint, it is not uncommon for the paint spray to spread somewhat, so it is essential to protect the area around your fence from absorbing possible paint spray. While you should be able to control the spray gun, for the most part, it can sometimes be inconsistent, and a gust of wind can drag it off track, so it is best to take precautions before an accident happens.
Step 3: Prepare Your Paint and Sprayer
Now that your fence and the surrounding area are ready, it is time to prepare the paint and the sprayer device. If you have not used your paint sprayer before, we strongly recommend reading the instruction manual for your specific sprayer device before continuing. It should alert you to any controls and settings and help you get acquainted with the design to use it to the best of its ability.
Most likely, you will need to thin out your paint with water so that it reaches the right consistency for your sprayer and its nozzle. For some paints, you may only need to thin it out by about 5 to 10%, but it could be as much as 50% with other paints. After adding a small amount of water to the paint, stir the solution well and test the consistency. Most spraying devices come with a funnel, so you can test the consistency before you start using the sprayer nozzle, but you can also spray the drop cloth to determine if the right texture has been reached.
When the paint is ready, fill up the paint reservoir or tank on your sprayer, and it is time to start painting.
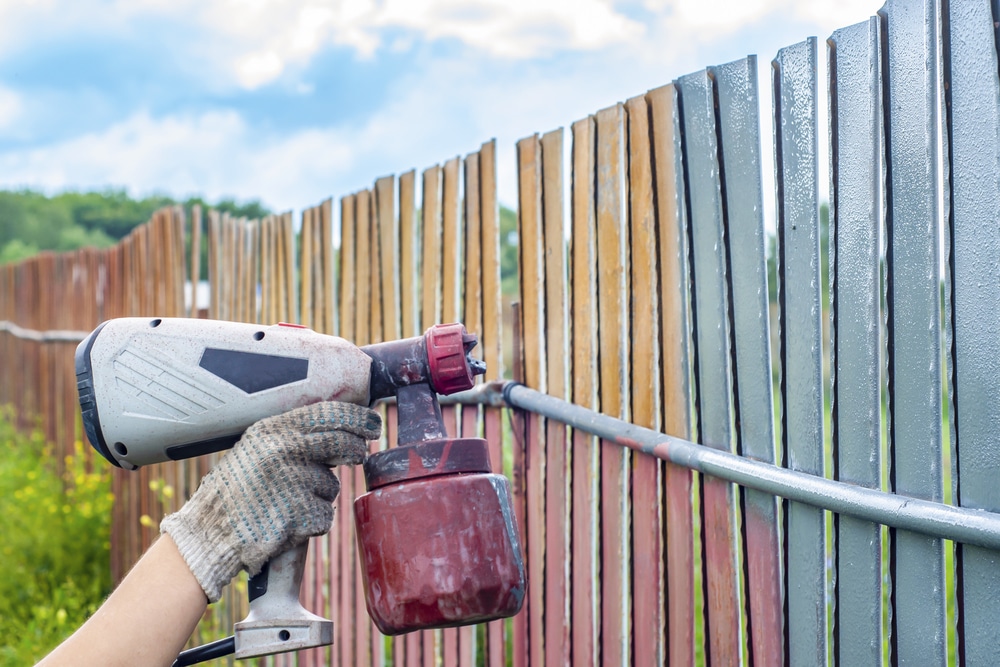
Step 4: Spray Your Fence Panels With Paint
Next, you need to plug in and turn on your paint sprayer. Using a broad spray paint setting, start spraying the fence. Paint the wood from top to bottom in the same direction as the wood grain to create a more even quality in the end. Hold the sprayer even with the wooden panels and avoid making an arcing motion at the end of each panel.
Got a busy week coming up. My new shed, base and Cuprinol paint sprayer being delivered along with 5L of fence paint.
— geoff (@VictorMeldrew17) April 25, 2020
Quite like this lockdown.
Use a horizontal spray pattern for painting wooden panels and move your arm in an up-and-down direction. Use a vertical spray pattern for painting rails and move your arm from side to side. Take care not to overspray the wooden fence panels. A thin coat of paint is best, even if it means you might have to apply a second or third coat.
Take your time, move slowly, and make sure you always hold the sprayer nozzle between 10 and 20cm away from the fence while spraying. It helps eliminate drips and also allows you to coat the fence panels more evenly.
Step 5: Check for Inconsistencies
Once you have applied an even coat of paint or stain, you will want to check for inconsistencies in colour and apply touchups where needed with a paintbrush. If you are satisfied with your results after a minor touchup, we recommend you check one more time the following day to ensure you successfully applied an even coat of paint. Otherwise, you can skip ahead to the final step and finish up.
Step 6: Apply Another Coat of Paint if Needed
Depending on the colour of stain or paint you chose, you may want to apply a second or possibly even a third coat. Again, take care not to overspray any specific area as it can lead to dark or thick spots which detract from the overall finished appeal.
One of the best investments I've made since being a homeowner was a Quarantine buy, a paint sprayer. I just did my fence in about 2 hours. The cost of extra paint/stain needed for over-spray is so worth it in time saved.
— Steve Catalano (@BrandedBuffalo) July 18, 2020
Don’t leave the paint in the reservoir without using it for more than 30 minutes, as the paint in the nozzle can quickly dry up and clog the spraying mechanism. If this occurs, you will need to clean the sprayer nozzle and hose before spraying another layer of paint.
Step 7: Clean up Your Mess
When you are satisfied with your results and the wood fence is sufficiently painted, finish by cleaning up your mess and your equipment. Start this part of the project by emptying any leftover paint from the reservoir back into the paint can. Then, wash out the tank and the sprayer.
Always clean the sprayer immediately after use to make it as easy as possible and ensure it doesn’t get clogged. If you used water-based paint, soapy water should be all you need to clean your sprayer. If you used oil-based paint, you would need mineral spirits to clean your sprayer. You can also soak the spray tip if it resists rinsing clean.
Once clean, add clean water to the tank and spray it through the nozzle at a high-pressure speed to get the hose and sprayer tip as clean as possible. Dump the water and let all of the parts dry before reassembling and putting away your sprayer.
Once the fence is completely dry, you can remove any drop cloths or ground coverings and replace any garden or patio furniture to its original position.
Fence paint update: given up and getting a paint sprayer pic.twitter.com/1TpJbauYHP
— 𝖪𝖺𝗍𝗂𝖾 (@KatieLouiseGunn) July 2, 2017
Painting Your Fence With a Sprayer Made Easy
After reading through our article, knowing how to paint a fence with a sprayer should seem easier than ever. Just remember to check the weather and make sure it will be dry for a couple of days with no wind, move the sprayer slowly while spraying, follow the grain of the wood, and only apply thin layers of paint, and you will be able to paint a fence with a sprayer like a pro in no time at all.
Let us know what you think in the comments below.
Emily is a woman of many talents. She has a B.A. in English and enjoys writing. Emily loves accessorising her home with quality products that not only serve a purpose but also enhance the overall convenience and tranquillity of her living space; there’s nothing like coming home to your own personal sanctuary after a long day! She loves anything that can make life easier or more comfortable—from dishware to furniture to lighting fixtures.