Last Updated on
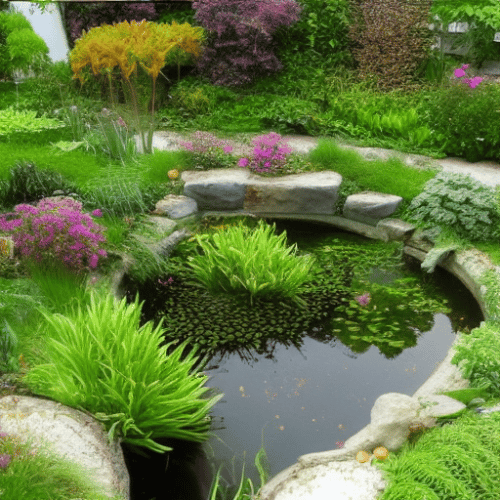
A small garden pond can make your garden look more elegant. You can plant water flowers in the pond or throw in some beautiful goldfish to add some life to it.
With the right materials and tools, you can easily build a pond that will last for a long time without leaking or having any problems. In this post, we are going to show you how to build a small garden pond. Let’s get right into it.
Step By Step Guide To Building A Garden Pond
Finally got a chance to build my own garden pond! pic.twitter.com/X80oXrYnjx
— Rodney Alan Rountree (@RodneyAlanRoun1) May 13, 2020
Step 1: Determine Where You Are Going to Build the Pond
Start off by determining where you are going to build the outdoor garden pond. It should be built in a place where there is enough sunlight.
The backyard pond should also be located in a place that has good drainage as you wouldn’t want rainwater or dirty water to drain into the small pond or make it dirty. Moreover, you may want to construct it in an open area, making it quite noticeable so you can view it from your patio and windows.
Three design tips for getting added value out of your garden pond: 1. Hide liner under protective layer and then soil to make it look natural. 2. Site it near a building so roof drainage runs into it. 3. Extend liner beyond pond edge just below ground to create a boggy area. pic.twitter.com/FT4YTpSCB5
— Alastair Driver (@AliDriverUK) April 11, 2021
Step 2: Determine the Size of Your Pond
Once you determine the location of the pond, you have to estimate the area that the pond is going to occupy. For example, a good pond should have a minimum depth of about 0.5m.
You can determine the length and width of the pond based on your preferences and the size of your outdoor garden. Use a gardening tool to draw the pond’s shape, depending on your personal preferences.
Full respect to you who do full size ponds 👍 Finally got my small ( but bigger than b4) garden pond in.Never again !!Took ages and grass now a quagmire. But in and level and now can have fun deciding planting etc . Done temporary. @OliverLynne pic.twitter.com/cHHDhwlApZ
— 🌱steffiec91 (@steffiec91) October 5, 2020
Step 3: Start Digging the Trench
Dig the pond, depending on the volume of water that you are planning to use. If you are planning to use a lot of water to accommodate some fish, the pond should have a minimum depth of about 1 metre. Deep water can shelter various types of fish from predators and also provide them with cooler areas on a hot day.
Apart from that, if you are planning to put some water pond plants in the pond, the minimum depth of the pond should be 1 metre. You can have some shallow areas and some deep parts to accommodate various natural creatures or animals. A shallow pond might be ideal for various pond plants and pond wildlife like toads and frogs.
Step 4: Create the Shape
Once you dig the trench, drive some wooden pegs into the ground along the edge of the trench.
Afterwards, nail wooden boards onto the pegs to act as retaining boards. Each edge should have a retaining board.
Retaining boards are quite effective in holding the material that is on the sides of the trench, preventing any slippages.
Next, check the levels of the trench to get an even surface that is flat on all sides. An uneven trench/hole that doesn’t have even sides might make the backyard pond ineffective. Just place the spirit level on the surface of the trench, then check if all the sides have an even level.
You can either add some soil on the surface of the trench or remove some soil from the surface, depending on the level of the finished level that you are planning to achieve.
Once you finish levelling the surface of the trench, compact it lightly with a garden tool like a spade or a rake to get a more stable base by removing the air that might be in the soil.
New garden pond beginning to take shape at last. Off to get plants next👍😎 pic.twitter.com/ALiyJuNz4D
— Julie Richards (@mountainponygrl) April 9, 2017
Step 5: Get Rid Of the Sharp Debris That Might Be On the Surface of the Trench
Check if there are any sharp stones or debris on the bed of the trench once you dig it and remove as many as you can. Stones, especially sharp ones, might pierce through the plastic sheet you are about to lay.
Hi @Homebase_help, we need non-sharp stones for our new garden pond, about 20mmin size. We have already bought your cobbles which are great, but need something smaller and not sharp. Can you please tell me what options there are?
— Jan Stannard (@janstannard) January 27, 2020
Step 6: Place the Plastic Sheet Liner on the Bed of the Trench (Pond Liner)
Next, place a plastic sheet liner on the bed of the trench. A plastic sheet, or pond liner, is quite effective in retaining water for a long period of time. Once you place the plastic sheet liner on the bed of the trench, take your shoes off and get into the trench. Start fixing the plastic sheet liner on the sides of the trench and on the bed of the trench.
Moreover, the plastic sheet liner should be a little bigger than the trench. Therefore, it should cover the whole trench and have some hanging over the sides, too.
You can throw some large rocks into the pond to secure the plastic sheet in one position. Also, large rocks might be ideal for the pond wildlife that like to create shelters around hard surfaces such as frogs.
Additionally, if frogs fall into the water accidentally, they can use those surfaces to get out of the pond.
Step 7: Pour the Water Into the Trench
Fill the trench with water. If you have a large water butt that collects rainwater, you may want to use this to fill the pond. You can also pour tap water into the pond with a garden hose. However, you have to let it sit there for a few days to allow the chlorine to dissipate and be left with fresh water that is safe for the frogs, fishes, and plants.
Step 8: Work On the Edge of the Pond
You have to work on the edges of the pond to improve its durability. Start off by cutting the excess plastic sheet to make it look neat. After that, fix some wooden boards on the edges of the pond to secure the plastic sheet on the ground, preventing any slippages. You can also place flat rocks on the edges, securing the liner sturdily to the ground. Rest them in an orderly manner, covering the plastic so that you can’t see the lining underneath.
Garden Pond project update: Sound guided intuition to stabilize edges yesterday AM. 🙏The rains we had overnight caused flash flooding. More rocks in today. Still some needed to replace temp bricks. Sealed with #bentonite clay. #permaculture #Bloomington pic.twitter.com/KeCMQS8LT9
— elizabeth izzo (@elizabethizzo) June 19, 2021
Step 9: Create a Runoff Drain for Water
If you want to keep the water clean and free from dirt particles, you should build a runoff drain. Just dig a shallow trench around the perimeter of the pond. It should be about 15cm from the edge of the pond that you are constructing to ensure it doesn’t affect the integrity of your main pond.
In most instances, dirt particles, algae, floating leaves, dead plants, and other debris might drain into your pond water, giving you a hard time while you are cleaning it. A runoff will help some of it drain out over time.
@TaraStCecilia Water in our garden pond reached the overrun drain. The big fish R safe but we have tons of babies and may have lost a few.
— H. Thea Nielsen (@DKDragon) August 26, 2012
Step 10: Add Various Plants
Once you finish constructing the backyard pond, you can add various plants based on your personal preferences. Such plants can be a part of the natural ecosystem, providing food to the wildlife that may be found in the pond like fish and frogs. Examples of such plants include water forget me not, water lettuce, marsh marigold, blue iris, flowering rush, and lilies. Birds might also fly to your garden ponds due to the plants and wildlife that might be found in such ecosystems.
My mini garden pond attempt using the plants I already have, hence all the pebbles… any hints of what plants to add, is very welcome!!! #gardenpondUK pic.twitter.com/eJpVuPTskE
— Kat (@Kat_Grace) June 26, 2021
Build a Pond In Your Garden
And there you have it, a step by step guide on how to build a high-quality pond in your garden. Most of these DIY procedures are quite simple and can be completed within a short period, giving you a high-quality pond. You can even construct a waterfall, fountain or other features to make your pond more stylish. There’s lots of pond setup inspiration online that you can turn to for help.
Apart from that, maintenance tasks and procedures should be carried out on a regular basis to keep the water clean and free from dirt particles and algae. Excess dirt particles and microorganisms might affect the wildlife in the pond. Due to this, you have to watch out for microorganism attacks to keep the wildlife healthy.
May I present to you: my very own, self build garden pond. It might not be a masterpiece but I am quite proud of it. 😊💪 pic.twitter.com/FkQAmhpkY6
— Tanja (@TanjaWho) July 13, 2019
Ian loves everything that revolves around the home improvement niche. He loves trying out new home appliances. He has also handled a lot of equipment and has a lot of insight. Plus, he’s worked on various home improvement projects that became a success.
If Ian isn’t busy working on his latest project, you can find him reading up about another one!