Last Updated on
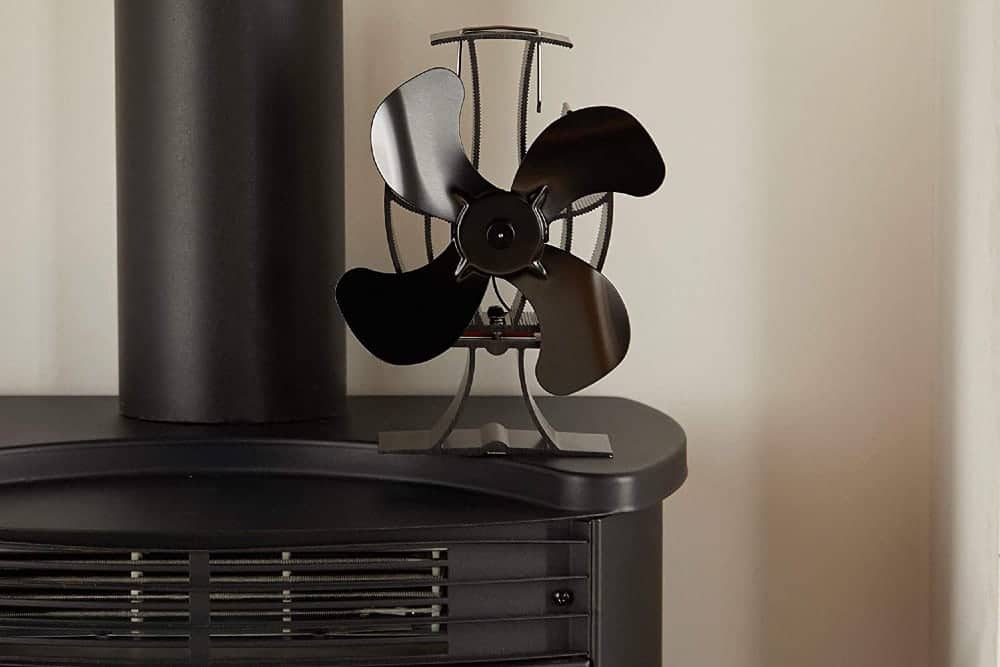
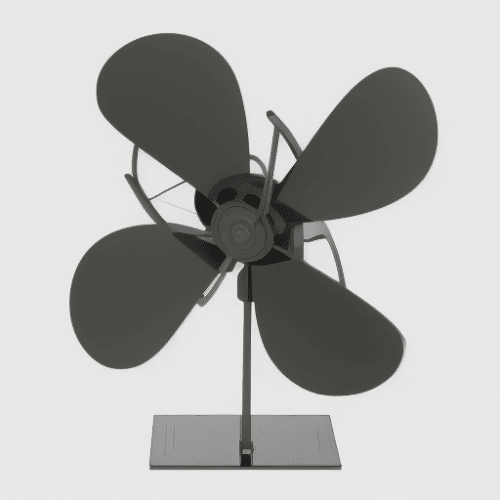
Are you ready to create your own heat powered stove fan? Whether it’s for an eco-friendly home or a DIY project, building a heat powered stove fan is both simple and satisfying. It requires minimal materials and tools, but the results are impressive. If you’re up for the challenge of constructing this amazing device then read on as we provide step-by-step instructions on how to build a heat powered stove fan that will help make your home more efficient. From gathering the necessary parts to testing out your final product, let us guide you through every stage of creating this unique invention.
Table of Contents:
- Gather the Materials
- Assemble the Motor
- Attach the Fan Blades
- Install Heat Sensor
- Test Your Fan
- FAQs in Relation to How to Build a Heat Powered Stove Fan
- Conclusion
Gather the Materials
Building a heat powered stove fan is an easy and cost-effective way to help circulate the air in your home. To get started, you’ll need to gather all of the necessary materials.
First, you will need a motor. This can be purchased from most hardware stores or online retailers for around $20-$30 depending on size and power output. You should also consider purchasing some fan blades that are compatible with your motor – these can range anywhere from $5-$15 each depending on size and material type.
Next, you’ll need to purchase some other components such as screws, nuts, bolts, washers and other fasteners that will hold everything together securely once assembled. These items are typically sold in bulk packs at local hardware stores or online retailers for around $10-$15 per pack.
Finally, it’s important to pick up a heat sensor so that the fan turns itself off when temperatures reach a certain level (usually around 100 degrees Fahrenheit). Heat sensors are usually sold separately for about $10-$20 each but may come included with some motors if purchased directly from the manufacturer.
Once you have gathered all of the necessary materials needed to build your heat powered stove fan, you are ready to start assembling.
Assemble the Motor
Assembling a motor for your fan is an important step in the installation process. It requires some basic knowledge of wiring and mounting, but it’s not too difficult if you take your time and follow the instructions carefully.
The first step is to connect the wires from the motor to their respective terminals on the fan housing. Make sure that each wire is connected securely and that there are no loose connections or exposed wires. If you’re unsure about how to do this, consult with a professional electrician or refer to your user manual for more detailed instructions.
Once all of the wires have been connected properly, it’s time to mount the motor onto its bracket inside of the fan housing. This can be done by using screws or bolts depending on what type of hardware came with your fan kit. Be sure that everything is tightened down firmly so that there won’t be any rattling noises when you turn on your fan later on down the line.
Next, attach any additional components such as heat sensors or speed controllers (if applicable) before securing them into place with screws or nuts and bolts as per manufacturer specifications. This is to ensure proper operation once installed correctly within its designated area in accordance with safety guidelines set forth by local building codes and regulations.
Now that the motor is assembled, it’s time to attach the fan blades and make sure they are securely fastened for optimal performance.
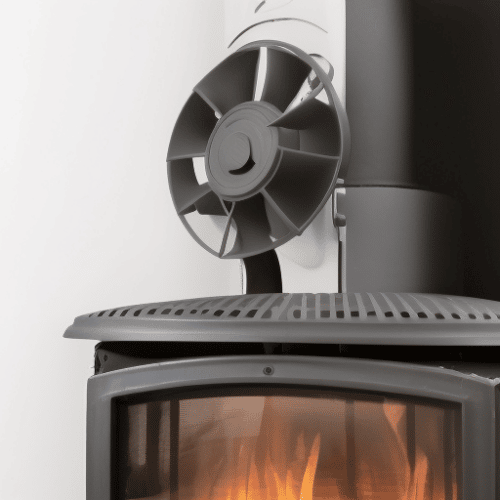
Attach the Fan Blades
Attaching the fan blades to the motor is a simple process that requires minimal tools and some basic knowledge. Before beginning, make sure you have all of the necessary components and safety equipment.
First, locate the mounting bracket on your fan blade assembly. Place it onto the motor shaft so that it fits snugly against the base plate. Secure it in place with two screws or bolts depending on what type of hardware came with your kit.
Next, take each individual fan blade and attach them to their respective slots in the mounting bracket using screws or bolts provided by your kit as well. Make sure they are securely fastened before moving onto step three.
Once all of your blades are attached, check for balance by spinning each one individually and making sure they spin freely without wobbling excessively from side-to-side or up-and-down motions. If any adjustments need to be made, use a small wrench or screwdriver to adjust accordingly until balanced properly.
Finally, install a heat sensor if applicable according to manufacturer instructions included in your installation manual (or online). This will help protect both you and your appliance from potential damage due to overheating caused by an unbalanced system running too hot for too long.
Once the fan blades are securely attached, it’s time to move on to installing the heat sensor, so that your stove fan can respond automatically when temperatures rise.
Install Heat Sensor
Installing a heat sensor is an important part of making sure your fan runs efficiently and effectively. Heat sensors are designed to detect when the temperature in the room has reached a certain level, at which point they will trigger the fan to turn on. This helps ensure that you don’t waste energy by running your fan unnecessarily or too often.
Tools Needed:
Before getting started, make sure you have all of the necessary tools and materials handy for installation. You’ll need a drill with appropriate bits, screws, wall anchors (if needed), wire cutters/strippers, and electrical tape. Additionally, it’s always best practice to wear safety glasses while drilling into walls or ceilings as well as gloves for protection from sharp edges or wires.
Location:
The first step is deciding where to install your heat sensor – typically this should be placed near the ceiling in order to get an accurate reading of air temperature throughout the room but can also be installed lower if desired. It’s important that there aren’t any obstructions such as furniture blocking airflow around it so that it can accurately detect changes in temperature without interference from other objects nearby.
Drilling and Mounting:
Once you’ve chosen where to place your heat sensor, use a drill bit slightly larger than the screw size required for mounting and carefully drill holes into either drywall or wood surfaces (depending on what type of wall/ceiling material you’re working with). Insert wall anchors if needed before inserting screws into each hole until firmly secured against surface material – this will help keep your heat sensor securely mounted even during high temperatures.
Wiring and Connections:
Now comes the time for wiring up your new device. Cut off excess wire length using wire cutters/strippers then strip away insulation from both ends before connecting them together using electrical tape – make sure not to leave any exposed metal parts after taping connections otherwise this could cause short circuits later down line. Finally, connect one end of wires directly onto terminals located inside the back panel of the unit itself while another end connects directly to an existing power source like the junction box behind the switch plate cover (or similar).
Once the heat sensor has been installed, it’s time to test your fan and make sure it is working correctly. Let’s move on to the next step and see how we can do that.
Test Your Fan
Testing your newly built heat powered stove fan is essential to ensure it works properly. The first step is to make sure the motor is working correctly. To do this, you’ll need a multimeter or voltmeter and set it to measure voltage. Connect one lead of the meter to each terminal on the motor and check that there’s power running through it. If there isn’t any power, double-check all connections before replacing the motor entirely.
Next, attach the fan blades onto the spindle of your fan using screws or bolts depending on what type of blade you have purchased for your fan. Make sure they are securely fastened so they don’t come loose while in use. Once attached, turn on your fan and check that all blades are spinning evenly with no wobbling or shaking motion which could indicate an issue with either the balance of your blades or their connection to the spindle itself.
When temperatures exceed a predetermined point in the area where air from your stove enters, your fan will automatically switch on and cool down the space it is placed in without you having to manually turn it off and on.
Finally, test out how well it works by lighting up something like candles around where air enters into room space (this should simulate high temperatures). If after doing so nothing happens then double-check all connections again as well as ensure that both the power supply and heat sensor are connected properly before trying again until successful results occur.
FAQs in Relation to How to Build a Heat Powered Stove Fan
Are heat powered stove fans worth it?
Yes, heat powered stove fans are worth it. They help to circulate warm air throughout the room, reducing energy costs and increasing comfort levels. The fan is powered by the heat of your stove, so no electricity or batteries are required – making them an eco-friendly choice for any home. Heat powered stove fans also come in a variety of styles and sizes to fit most stoves and budgets, making them a great investment for anyone looking to improve their home heating system.
What makes a heat powered fan work?
Heat powered fans work by using the heat from a stove or fireplace to power a fan. The fan draws in cooler air from outside and circulates it around the room, creating an even temperature throughout. Heat powered fans are designed with special thermoelectric modules that convert the heat energy into electrical energy, which is then used to power the fan blades. This process allows for efficient cooling without any additional electricity usage.
Conclusion
Congratulations! You have now built your own heat powered stove fan. It may not be the most efficient way to circulate air in your home, but it is a great DIY project that you can do with minimal materials and effort. With just a few simple steps on how to build a heat powered stove fan, you’ve created something that will help keep your home warm and comfortable during the cold winter months. So why not take on this project today and build a heat powered stove fan of your own? You’ll be glad you did.
Paul is the type of person who never met a problem he couldn’t fix. He can always be found tinkering with something in his house, even if it isn’t broken! His tips and tricks are often shared on our site. He’s the one you call when something breaks because he has been known to improvise fixes for everything from leaky faucets to malfunctioning dryers.